If you love watching birds visit your garden, keeping your plastic bird feeder clean is key. Dirty feeders can spread germs and scare away your feathered friends.
But cleaning it doesn’t have to be hard or time-consuming. In this guide, you’ll discover simple, effective steps to keep your bird feeder sparkling clean and safe for birds. Ready to make your feeder a healthy spot for birds to enjoy?
Let’s get started!

Credit: www.reddit.com
Gather Cleaning Supplies
Gathering the right cleaning supplies is the first step to keep your plastic bird feeder safe and clean. Proper tools help remove dirt, mold, and bacteria effectively. Preparing everything before cleaning saves time and makes the process easier.
Essential Tools And Materials
- Mild dish soap – gentle and effective for cleaning plastic
- Soft brush or sponge – prevents scratches on the feeder
- White vinegar – natural disinfectant to kill germs
- Bucket or basin – holds water and cleaning solution
- Clean cloth or towel – for drying the feeder
- Gloves – protect your hands during cleaning
- Old toothbrush – reaches small crevices and corners
Safety Precautions
Wear gloves to avoid direct contact with dirt and cleaning agents.
Clean the feeder in a well-ventilated area to avoid inhaling fumes.
Use mild soap and vinegar to protect birds from harmful chemicals.
Rinse the feeder thoroughly to remove all cleaning residues.
Keep cleaning supplies out of reach of children and pets.

Credit: green-backyard.com
Disassemble The Feeder
Before you start cleaning your plastic bird feeder, taking it apart is essential. Disassembling makes sure you reach every corner where dirt and mold hide. It also helps prevent damage during cleaning and gives you a clear view of all parts that need attention.
Remove All Parts
Begin by carefully separating each piece of your bird feeder. Most plastic feeders come with removable trays, lids, and perches. Take out all these components and place them on a clean surface.
Pay attention to small parts like screws or hooks that might be easy to lose. Keeping everything organized speeds up the cleaning process and stops you from missing any spots. Have you noticed stubborn dirt trapped under parts you usually leave attached?
Check For Damage
Once disassembled, inspect each part closely for cracks, chips, or worn areas. Damaged pieces can harbor bacteria and pose risks to birds. If you find any broken parts, it’s best to replace them before reassembling.
Sometimes, tiny cracks are hard to spot but can cause feeder leaks or mold buildup. Checking thoroughly now saves you from bigger problems later. What would happen if you continued using a feeder with hidden cracks?
Initial Rinse
Cleaning a plastic bird feeder starts with an initial rinse. This step removes dirt and old seeds. It helps prepare the feeder for a more thorough cleaning. A good rinse makes the process easier and faster. It also helps keep the birds safe from mold or bacteria.
Remove Loose Debris
Begin by shaking the feeder gently to get rid of loose seeds. Use a soft brush or cloth to wipe off dirt and dust. Pay special attention to corners and crevices. Rinse the feeder under warm running water. Avoid using hot water as it can warp the plastic. This removes leftover particles that can spoil the next feeding.
Prepare For Deep Cleaning
After the initial rinse, check for stubborn spots or sticky residue. Soak the feeder in a mixture of water and mild soap. Use a soft brush to scrub hard-to-reach areas. Rinse thoroughly to remove all soap traces. Set the feeder aside to dry before refilling it with fresh seeds. This step ensures the feeder is safe and clean for birds.

Credit: green-backyard.com
Deep Cleaning Process
Keeping your plastic bird feeder clean is essential for the health of the birds and the longevity of your feeder. A deep cleaning process ensures all dirt, mold, and bacteria are removed effectively. This process might take a little time, but it’s worth the effort to provide a safe feeding environment.
Use Mild Soap Solution
Start by preparing a mild soap solution using warm water and a gentle dish soap. Avoid harsh chemicals that can leave harmful residues or damage the plastic. Soak your feeder parts in this solution for about 10-15 minutes to loosen any stuck debris.
Have you noticed how sticky residue can build up in tiny crevices? Soaking helps soften these hard-to-reach spots before scrubbing.
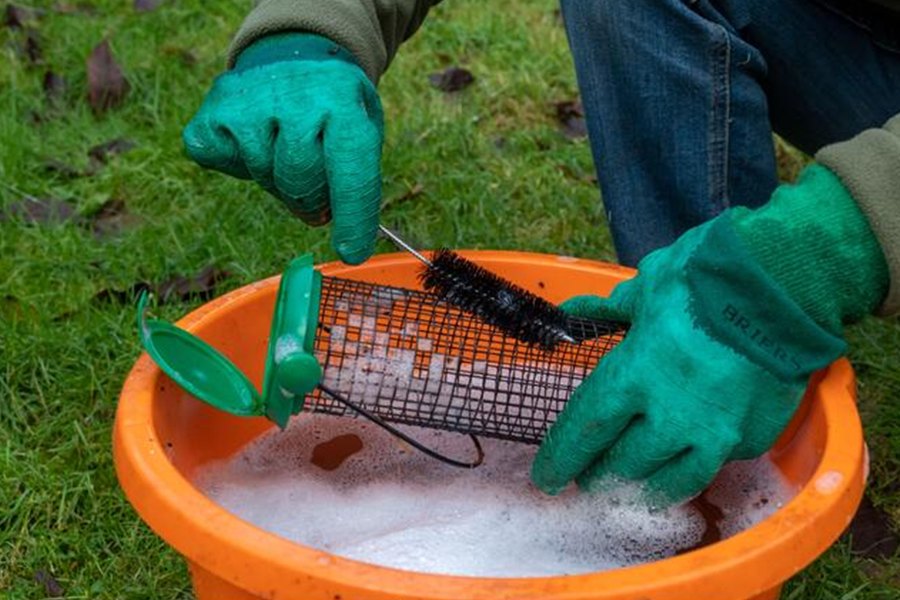
Scrub With Soft Brush
Use a soft-bristled brush to gently scrub every part of the feeder, paying close attention to corners and feeding ports. A toothbrush works well for small areas, while a larger brush can cover flat surfaces quickly.
Be thorough but gentle—scratching the plastic can create hiding spots for bacteria. Rinse the feeder thoroughly with clean water to wash away soap and loosened grime.
Sanitize To Kill Germs
After scrubbing, sanitize the feeder to kill any lingering germs and mold spores. A simple mixture of one part white vinegar to four parts water works well as a natural sanitizer. Soak or spray the feeder, then let it sit for at least 10 minutes.
Rinse thoroughly with water before drying completely. Have you ever skipped sanitizing and noticed a quick return of mold? This step is crucial for long-term cleanliness and bird safety.
Rinse Thoroughly
Rinsing your plastic bird feeder thoroughly is a crucial step in keeping it safe and inviting for birds. Soap or cleaning agents left behind can harm the birds or discourage them from visiting. Taking the time to rinse well ensures all cleaning residues are removed and your feeder is fresh and ready to use.
Remove Soap Residue
After scrubbing your feeder, rinse it under running water for several minutes. Use your fingers or a soft brush to gently rub any tight corners or crevices where soap might hide. If you notice bubbles or a slippery feeling, keep rinsing until the water runs clear and feels clean to the touch.
Inspect For Cleanliness
Hold the feeder up to the light to spot any remaining dirt or soap film. Look inside all compartments and around feeding ports carefully. If you see any spots that still look cloudy or dirty, rinse again until the entire feeder looks spotless and feels smooth.
Dry Completely
After thoroughly cleaning your plastic bird feeder, ensuring it dries completely is essential. Moisture trapped inside or on the surface can lead to problems that undermine all your hard work. Taking the time to dry your feeder well helps keep it safe and inviting for your feathered visitors.
Air Drying Tips
Place your bird feeder in a sunny, well-ventilated spot to speed up the drying process. Fresh air moves moisture away, preventing damp spots that can hide inside crevices. If possible, hang the feeder so air can circulate around every surface.
Using a clean, dry cloth to wipe off excess water before air drying can cut down drying time significantly. Avoid drying indoors where humidity might keep the feeder damp longer. Have you noticed how leaving your feeder in direct sunlight makes it dry faster and fresher?
Prevent Mold And Mildew
Mold and mildew thrive in wet, dark places, so drying your feeder completely is a key step to stop their growth. Even a small amount of leftover moisture can create a breeding ground for these fungi, which are harmful to birds.
After drying, inspect the feeder carefully for any spots that look damp or sticky. You might want to store your feeder in a dry area when not in use to keep it mold-free between cleanings. What simple habits could you add to your routine to protect your feeder from mold?
Reassemble And Refill
After thoroughly cleaning your plastic bird feeder, it’s time to put everything back together and prepare it for your feathered visitors. Reassembling and refilling your feeder correctly ensures it works well and keeps the birdseed fresh. This final step can make a big difference in attracting birds and maintaining their health.
Check For Proper Fit
Before you add any birdseed, carefully check each part to make sure it fits snugly. Loose pieces can cause spills or allow moisture inside, which spoils the seed quickly. Take a moment to align the feeder’s components and snap or screw them back in place securely.
Have you ever noticed birds avoiding a feeder that leaks or wobbles? That’s often because the feeder isn’t assembled tightly. Ensuring a proper fit prevents these issues and helps keep your garden clean.
Add Fresh Birdseed
Use fresh birdseed that suits the types of birds you want to attract. Avoid old or damp seed, as it can mold and harm the birds. Fill the feeder to a level that won’t overflow but offers enough food to keep your visitors coming back.
Consider using a mix with sunflower seeds, millet, or nyjer depending on your local birds. Have you ever seen how different birds prefer different seeds? Matching your seed choice to local species can make your feeder a hotspot.
Once refilled, place the feeder back in its spot and observe. How long does it take for the seed to disappear? This simple observation can tell you if you need to adjust the amount or type of seed next time.
Regular Maintenance Tips
Keeping your plastic bird feeder clean is important for bird health and feeder longevity. Regular maintenance helps avoid mold, bacteria, and old seed buildup. It also keeps your feathered visitors safe and happy.
Simple habits can make cleaning easier and keep the feeder fresh. A little effort every week prevents bigger problems later.
Cleaning Frequency
Clean the feeder at least once every two weeks. If you see mold or wet seeds, clean it immediately. During wet seasons, increase cleaning to once a week. More frequent cleaning stops germs from spreading among birds.
Spot Cleaning Between Washes
Check the feeder daily for dirt or leftover seeds. Use a damp cloth or soft brush to wipe dirty spots. Remove any wet seeds quickly to stop mold growth. This quick cleaning keeps the feeder tidy without full washing each time.
Frequently Asked Questions
How Often Should I Clean My Plastic Bird Feeder?
Clean your plastic bird feeder every two weeks to prevent mold and bacteria. Frequent cleaning keeps birds healthy and attracts more visitors.
What Is The Best Cleaning Solution For Plastic Feeders?
Use a mixture of one part white vinegar to four parts water. It safely removes dirt and kills harmful germs without damaging plastic.
Can I Use Bleach To Clean Plastic Bird Feeders?
Yes, but dilute bleach with nine parts water. Soak for 10 minutes, then rinse thoroughly to avoid harming birds.
How Do I Dry A Plastic Bird Feeder After Cleaning?
Air dry the feeder completely before refilling. Drying prevents moisture buildup, which can cause mold and spoil birdseed.
Conclusion
Cleaning your plastic bird feeder is simple and essential. Regular cleaning prevents mold and bacteria. It keeps birds healthy and happy. Use soap, water, and a brush. Rinse well to remove soap residue. Dry the feeder completely before refilling. These steps ensure a clean environment for your feathered friends.
Maintenance ensures your feeder lasts longer. Enjoy watching healthy birds visit your garden. Remember, a clean feeder equals happy birds. Now you’re ready to maintain a safe feeding spot. Keep it up for the love of birds!