Have you ever wished you could enjoy watching birds visit your garden without constantly refilling their feeder? Imagine a bird feeder that works on its own, giving you more free time and attracting more feathered friends.
In this guide, you’ll discover simple steps to make your very own auto bird feeder. Whether you’re a beginner or just want to upgrade your current setup, this easy-to-follow plan will help you create something both clever and useful. Keep reading, and soon you’ll have a smart feeder that keeps birds happy—and you more relaxed.
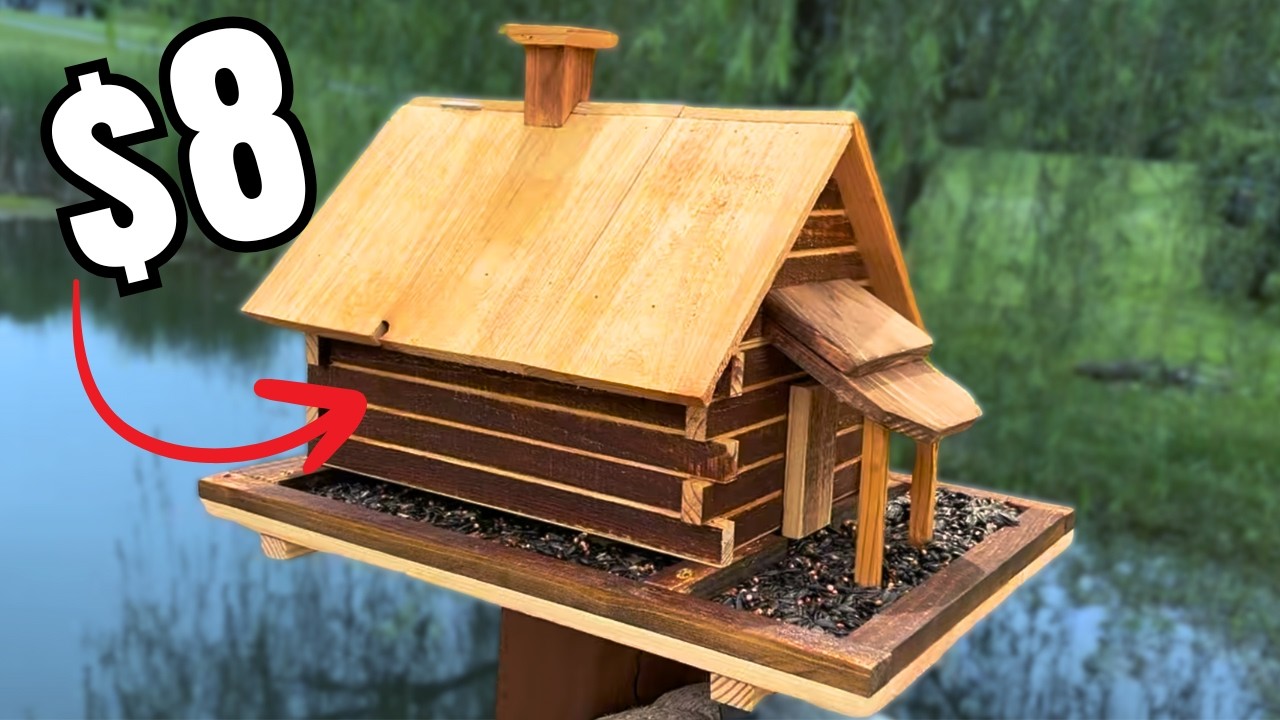
Materials Needed
Gathering the right materials is the first step to building an effective auto bird feeder. Having everything ready prevents interruptions and makes the process smoother. Let’s look at what you need to bring your bird feeder to life.
Basic Tools
- Screwdriver:Essential for assembling parts and securing screws tightly.
- Drill:Useful for creating precise holes for screws or bird food openings.
- Measuring Tape:Helps ensure your feeder components fit perfectly together.
- Wire Cutters or Scissors:Needed for trimming wires or strings used in the design.
- Sandpaper:Smooths rough edges to keep your feeder safe for birds.
Bird Feeder Components
- Plastic or Wood Container:The main body where bird seeds will be stored.
- Small Motor or Servo:Drives the automatic release mechanism for seeds.
- Battery Pack:Powers the motor to keep your feeder running without constant manual work.
- Seed Dispenser Valve or Slide:Controls how much seed is released at a time.
- Hinges or Springs:Allow moving parts to open and close smoothly.
- Mesh or Perch:Gives birds a place to stand while feeding.
Optional Accessories
- Solar Panel:If you want a green power source to recharge your battery pack.
- Sensor (Motion or Light):Automates seed release only when birds are nearby.
- Weatherproof Paint or Sealant:Protects your feeder from rain and sun damage.
- Camera Mount:For bird watchers who want to capture feeding moments.
- Extra Seed Trays:To expand feeding space or separate different seed types.
Do you prefer a simple design or one packed with tech? Your choice will affect which materials you need most. Think about your local bird species and weather conditions too, as these factors guide the material selection for a feeder that lasts and attracts the birds you want to see.

Credit: www.youtube.com
Choosing The Right Design
Choosing the right design for your auto bird feeder is crucial to attract the birds you want and keep the feeder functional through changing seasons. The design you pick affects not only how easy it is to build but also how well it serves the birds’ needs. Let’s break down what you should consider to make your feeder both effective and enjoyable.
Simple Vs Complex Feeders
Simple feeders are easier to build and maintain. They often use fewer parts and materials, which means less chance of something breaking or jamming. If you’re new to DIY projects, starting with a simple design can help you understand how feeders work without getting overwhelmed.
Complex feeders can offer features like automatic seed dispensing or multiple feeding ports. These designs might attract a wider variety of birds but require more time and skill to create. Ask yourself: do you want a feeder that just works, or one that impresses with advanced features?
Consider Bird Types
Different birds prefer different types of feeders. Small songbirds, like finches, often like tube feeders with tiny perches, while larger birds might need tray feeders or hopper styles. Knowing which birds you want to attract will guide your design choices.
Think about the local birds in your area. Do they prefer seeds, suet, or nectar? Matching your feeder to their favorite food increases your chances of visits. Have you noticed what birds come to your yard naturally? Use that as a clue.
Weatherproof Features
Your feeder will face rain, wind, and sometimes snow. Adding weatherproof features protects the seeds and the feeder itself. A simple roof or overhang can keep moisture out, preventing mold and spoiled food.
Using durable materials like treated wood or plastic helps your feeder last longer. Consider adding drainage holes to avoid water buildup. How often do you want to clean or refill your feeder? Weatherproofing can reduce the frequency by keeping the food fresh.
Step-by-step Construction
Building an auto bird feeder is simple and fun. This guide breaks down the construction into clear parts. Follow these steps to create a feeder that works automatically. Each step uses easy tools and materials you can find at home or a local store.
Preparing Materials
Gather all needed supplies before starting. This helps keep the project smooth and fast. You will need:
- Plastic bottle or container
- Wooden base or board
- Small motor or servo
- Battery pack
- Wires and switch
- Plastic tubing or small pipe
- Glue and screws
- Tools like scissors, screwdriver, and drill
Choose a container that holds enough birdseed. Make sure the motor fits your setup. Check batteries for enough power.
Assembling The Feeder
Start by fixing the container onto the wooden base. Use screws or strong glue to secure it. Cut holes at the bottom of the container for seed flow. Attach the plastic tubing to guide seeds out. Make small perches near the seed outlet for birds to sit. Ensure everything is stable and safe for birds.
Installing Auto-dispense Mechanism
Connect the motor to the base near the seed outlet. Attach a small paddle or wheel to the motor shaft. This will push seeds out when turned. Wire the motor to the battery pack and add a switch. Test the motor to see if it dispenses seeds smoothly. Adjust the motor speed to control the seed flow rate. Cover electrical parts to protect from rain and dirt.

Credit: www.popsci.com
Setting Up The Feeder
Setting up your auto bird feeder correctly is key to attracting the right birds and ensuring the feeder works smoothly. This part involves choosing the perfect spot, securely mounting the feeder, and making sure it dispenses food properly. Your setup choices can make a big difference in how often birds visit and how well your feeder performs.
Selecting Location
Pick a spot that’s visible and safe for birds. Near a window is great for watching, but make sure it’s not too close to where predators might hide. Also, consider placing it near trees or shrubs where birds can quickly retreat if they feel threatened.
Think about sunlight and weather too. Too much direct sun can spoil the feed, while heavy wind might cause the feeder to swing. A sheltered spot can keep your feeder lasting longer and more comfortable for birds.
Mounting Options
You can mount your feeder on a pole, hang it from a sturdy branch, or attach it to a wall or fence. Each option has pros and cons depending on your yard’s layout and what birds you want to attract.
- Poles:Easy to install and move. Use squirrel baffles to keep pests away.
- Branches:Natural look but ensure the branch is strong enough.
- Walls or Fences:Stable and secure but may limit bird access from certain directions.
Choose a mounting method that keeps the feeder stable and easy for you to refill. From personal experience, a pole with a baffle worked best in my garden to keep squirrels at bay.
Filling And Testing
Fill the feeder with fresh birdseed or the preferred feed your target birds like. Avoid overfilling to prevent waste and spoilage. Make sure the auto-dispensing mechanism is clean before adding seed to avoid jams.
Test the feeder by triggering the dispensing mechanism a few times. Watch closely to see if the feed drops smoothly and the system refills correctly. If it sticks or clogs, adjust the parts or clean the mechanism.
Have you noticed any birds avoiding your feeder? Sometimes testing and tweaking the feed type and amount can make all the difference in attracting more visitors.
Maintaining Your Feeder
Maintaining your auto bird feeder keeps it working well and birds happy. Regular care prevents damage and keeps seeds fresh. A clean feeder stops mold and pests. Proper refilling ensures continuous feeding. Quick fixes solve common problems fast. Follow these simple tips for best results.
Cleaning Tips
Clean the feeder every two weeks. Use warm water and mild soap. Avoid harsh chemicals that can harm birds. Rinse thoroughly to remove all soap. Let the feeder dry before refilling. Clean feeding ports to prevent blockages. Wipe off bird droppings and dirt daily.
Refilling Frequency
Check seed levels daily during peak feeding times. Refill before seeds run out. Keep seed fresh and dry to avoid mold. Use high-quality bird seed for better results. Adjust refilling based on bird activity and season. Avoid overfilling to reduce spillage and waste.
Troubleshooting Common Issues
- Feeder not dispensing seeds: Check for clogs or jams in the mechanism.
- Birds not visiting: Move feeder to a quieter, safer spot.
- Seeds getting wet: Ensure feeder roof is secure and water-resistant.
- Squirrel or pest interference: Add baffles or place feeder away from easy access.
- Feeder parts breaking: Inspect regularly and replace worn components promptly.
Attracting Birds Safely
Attracting birds to your auto bird feeder is rewarding, but it requires careful attention to their safety. Creating a welcoming spot means thinking beyond just food. You want to protect your feathered visitors from harm while keeping them coming back.
Choosing The Right Seeds
Different birds prefer different seeds, so offering the right mix matters. Black oil sunflower seeds attract a wide variety of birds and are easy to digest. Millet and cracked corn are favorites of ground feeders like doves and sparrows.
Avoid cheap seed mixes filled with fillers like red millet or wheat, which many birds ignore. Think about the birds common to your area and select seeds that suit their diets. Your feeder will be busier and cleaner when birds find food they truly want.
Avoiding Predators
Protecting birds from predators like cats, squirrels, and hawks is essential. Place your feeder at least 10 feet away from jumping-off points like fences or trees to limit access for squirrels and cats. Installing baffles or guards on poles can block squirrels from climbing.
Consider hanging feeders where cats can’t reach, or use feeders with weight-activated perches that close off access to heavier animals. Have you noticed how some feeders make birds feel unsafe? Small changes can make your feeder a refuge rather than a risk.
Seasonal Adjustments
Bird needs change with the seasons, and so should your feeder setup. In winter, high-energy foods like suet or peanuts help birds survive cold days. During spring and summer, offer fresh water nearby since natural sources may dry up.
Adjust seed types and feeder locations to suit the season’s weather and bird behavior. For example, moving feeders to shadier spots in summer can protect birds from heat stress. How often do you rethink your feeder’s setup as seasons change? This habit can make a big difference in bird safety and enjoyment.
Credit: www.youtube.com
Frequently Asked Questions
How Does An Auto Bird Feeder Work?
An auto bird feeder releases birdseed automatically using a timer or sensor. It ensures consistent feeding without manual refills. This attracts birds regularly, making birdwatching easier and more enjoyable.
What Materials Are Needed For An Auto Bird Feeder?
Common materials include a plastic bottle, small motor, timer or sensor, battery pack, and birdseed. Additional items like wires, glue, and mounting hooks help assemble and secure the feeder.
How To Maintain An Auto Bird Feeder Properly?
Clean the feeder every two weeks to prevent mold and bacteria. Check the motor and battery regularly. Refill birdseed and ensure sensors or timers function correctly for uninterrupted feeding.
Can I Customize The Feeder For Different Bird Types?
Yes, customize seed type and feeder size to attract specific birds. Adjust the feeding mechanism height and opening size to suit bird species preferences.
Conclusion
Building an auto bird feeder is simple and rewarding. Birds enjoy a constant food supply. Your backyard becomes lively and active. Follow the steps carefully for best results. Use durable materials for long-lasting feeders. Regular maintenance ensures it works smoothly.
Invite friends to admire your handiwork. Enjoy watching different bird species visit. A great way to support local wildlife. Encourage others to try making one too. Share your experience and tips. Happy bird watching!