Have you ever looked at an empty plastic bottle and thought, “What if this could help the birds in my neighborhood?” You might be surprised how easy it is to turn something as simple as a plastic bottle into a charming bird feeder.
Not only will you be giving new life to waste, but you’ll also create a little haven for birds right outside your window. Imagine the joy of watching colorful birds visit your garden every day, all because you took a few simple steps.
Keep reading, and you’ll discover exactly how to make your own bird feeder with just a plastic bottle and a few basic tools. It’s fun, eco-friendly, and something you can do right now.

Credit: www.youtube.com
Materials Needed
Gathering the right materials is key to creating a bird feeder from plastic bottles. You need simple items that are easy to find at home or in local stores. Preparing everything before starting makes the process smooth and enjoyable.
Plastic Bottle Types
- Use clean, empty bottles made of PET or HDPE plastic.
- Choose bottles with a wide mouth for easier filling.
- Look for bottles between 16 to 32 ounces for a good size.
- Avoid bottles with labels that are hard to remove.
Tools Required
- Sharp scissors or a utility knife for cutting openings.
- A drill or nail for making small holes.
- Sandpaper to smooth rough edges.
- A ruler or measuring tape for precise cuts.
Additional Supplies
- Strong string, twine, or wire to hang the feeder.
- Non-toxic paint or markers for decoration (optional).
- Wooden spoons or small sticks to serve as perches.
- Birdseed mix suitable for local birds.
Preparing The Bottle
Preparing the plastic bottle is the first important task. It sets the base for a safe and usable bird feeder. Proper preparation ensures the feeder lasts longer and stays clean for birds to enjoy.
Cleaning The Bottle
Rinse the bottle with warm water to remove any dirt or residue. Use a mild soap to clean inside and outside thoroughly. Avoid strong chemicals that can harm birds. Let the bottle dry completely before moving to the next step.
Marking Cut Lines
Use a permanent marker to draw clear cut lines on the bottle. Plan holes for seed access and perches. Keep the marks simple and easy to follow. Make sure the holes are big enough for birds but safe from sharp edges.
Cutting And Shaping
Cutting and shaping the plastic bottle is where your bird feeder really starts to take form. This step requires care and precision to make sure the feeder is safe for both you and the birds. The way you cut the bottle affects how easy it will be to fill and how accessible the food is for your feathered visitors.
Safe Cutting Techniques
Safety should be your top priority when cutting plastic bottles. Use a sharp utility knife or scissors designed for tough materials to get clean cuts without jagged edges.
Wear thick gloves to protect your hands from accidental slips. Always cut away from your body and work on a stable surface to avoid mishaps.
Try heating the knife blade slightly before cutting—it helps slice through the plastic more smoothly. Have you ever struggled with uneven cuts? This little trick can save you a lot of frustration.
Creating Feeding Ports
Feeding ports are openings where birds can access the seeds. Decide on the size and shape based on the types of birds you want to attract—small round holes for finches or larger oval openings for sparrows.
Use a drill or heated metal object to create smooth holes that won’t harm the birds. Make sure the ports are evenly spaced around the bottle to allow multiple birds to feed at once.
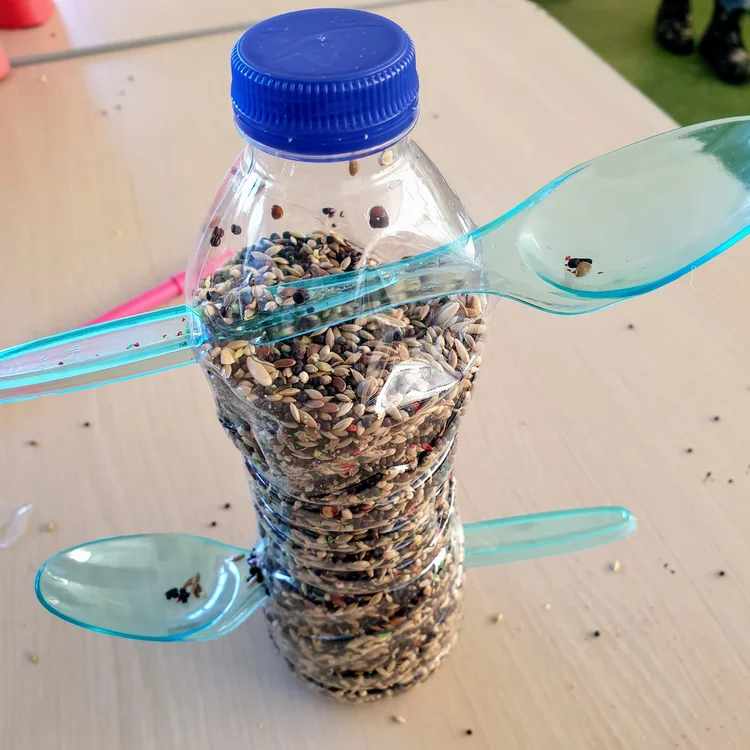
Consider adding small perches below each opening by attaching wooden sticks or thick wire. This gives birds a comfortable place to land and makes your feeder more inviting.
Assembling The Feeder
Turning a plastic bottle into a bird feeder is a fun and rewarding project, but assembling it properly is key to making it functional and safe for your feathered visitors. This part of the process focuses on adding essential features that allow birds to comfortably perch and access the food, as well as ensuring the feeder can hang securely in your yard or garden.
Adding Perches
Perches give birds a place to stand while they eat, so adding them thoughtfully is important. You can use wooden dowels, sturdy sticks, or even thick pencils. Drill small holes near the feeding openings and insert the perches so they stick out enough for birds to grip easily.
Make sure the perches are stable and won’t wobble when a bird lands on them. If they feel loose, try adding a bit of glue or tape underneath for extra support. Have you noticed how birds prefer perches that are just the right size for their feet? Avoid making them too thin or too thick to keep your visitors happy.
Attaching Hanging Mechanism
To hang your feeder, you need a secure and balanced hanging mechanism. Use strong string, twine, or wire to create a loop at the top of the bottle. Punch two small holes opposite each other near the bottle’s opening, thread your hanging material through, and tie it tightly.
Check that the feeder hangs evenly and doesn’t tip when you fill it with seeds. A well-balanced feeder prevents spillage and keeps birds safe while feeding. Have you considered placing the feeder where you can easily refill it but also where birds feel safe from predators?
Decorating Ideas
Decorating your plastic bottle bird feeder is more than just making it look nice—it’s about creating a welcoming space for birds while reflecting your personal style. A well-decorated feeder can blend into your garden or stand out as a cheerful focal point. Think about colors, textures, and materials that will attract birds and also survive outdoor conditions.
Painting Tips
Choose outdoor acrylic paints for vibrant colors that resist fading. Apply a primer first to help the paint stick better to the plastic surface.
Use bright colors like red, yellow, or blue to catch birds’ attention. Avoid dark colors that absorb too much heat and might harm the birds.
Try adding patterns or simple shapes like dots, stripes, or leaves to give your feeder a playful look. Seal the paint with a clear, weatherproof spray to protect your design from rain and sun.
Using Natural Elements
Adding natural elements makes your bird feeder feel like part of the environment. Glue small twigs, pinecones, or dried leaves around the bottle for a rustic appearance.
Try wrapping jute twine or raffia around the neck or base for an earthy touch that also provides extra grip for birds. You can even press small flowers or herbs onto the bottle before sealing them with clear glue to add a subtle, natural scent.
Have you noticed how birds prefer feeders that look like part of their habitat? Using natural materials not only decorates but also invites more feathered visitors.

Credit: www.youtube.com
Placing Your Feeder
Placing your homemade bird feeder in the right spot is key to attracting birds and keeping them safe. A good location makes it easy for birds to find food and feel secure while feeding. Thoughtful placement also protects your feeder from weather and pests. Spend time choosing a spot that benefits both birds and your garden.
Choosing The Right Location
Pick a quiet place with some natural cover like trees or shrubs nearby. Birds like to perch close to feeders before and after eating. Avoid locations too close to windows to prevent bird collisions. Place your feeder where it gets some sunlight but also shade during hot afternoons. Keep it away from busy footpaths and noisy areas to reduce stress for birds.
Ensuring Bird Safety
Hang your feeder high enough to avoid cats and other predators. Use sturdy hooks or wires to secure it firmly. Clear the ground below to avoid hiding spots for predators. Clean the feeder regularly to prevent disease spread among birds. Check for sharp edges or loose parts that could hurt the birds. Safe feeders encourage more birds to visit and stay longer.
Maintaining The Feeder
Maintaining your plastic bottle bird feeder ensures it stays safe and attractive for birds. Cleanliness prevents mold and bacteria, keeping birds healthy. Regular upkeep also extends the feeder’s life and keeps it working well.
Regular Cleaning
Clean the feeder every two weeks. Use warm, soapy water to wash all parts. Rinse thoroughly to remove soap. Avoid harsh chemicals that can harm birds. Let the feeder dry completely before refilling. This stops mold growth and keeps the food fresh.
Refilling Tips
Refill the feeder often to keep food fresh. Use birdseed that matches local bird types. Avoid overfilling to prevent waste and spoilage. Check for wet or moldy seeds and remove them quickly. Place the feeder in a shaded spot to protect seeds from heat.

Credit: garethmate.com
Frequently Asked Questions
How Do You Clean Plastic Bottles For Bird Feeders?
Rinse plastic bottles thoroughly with warm soapy water. Remove labels and dry completely. This prevents mold and keeps birds safe.
What Materials Are Needed To Make A Bird Feeder?
You need a plastic bottle, scissors, string, wooden spoons, and birdseed. These simple items create an effective and eco-friendly feeder.
How Do You Hang A Plastic Bottle Bird Feeder?
Use a strong string or wire through the bottle’s top. Hang it from a sturdy tree branch or hook outdoors.
Which Birdseed Is Best For Plastic Bottle Feeders?
Use a mix of sunflower seeds, millet, and cracked corn. This variety attracts different bird species to your feeder.
Conclusion
Creating a bird feeder from plastic bottles is simple and fun. This activity helps recycle and benefits local birds. Plus, you get to enjoy birdwatching right at home. Gather your materials, follow the steps, and get creative. It’s an easy way to help the environment.
Plus, birds will love their new feeding spot. Encourage friends and family to join in. Spread the word about recycling plastic creatively. Enjoy the chirping and fluttering of happy birds. Your garden will be lively and green. Keep recycling and making more feeders.
Nature will thank you!