Do you want to bring more birds to your garden and enjoy their cheerful songs up close? Making a homemade bird feeder is easier than you think, and it’s a fun way to connect with nature.
In this guide, you’ll discover simple steps to create your own bird feeder using materials you probably already have at home. By the end, you’ll have a beautiful feeder that attracts colorful birds and brightens your outdoor space. Ready to start?
Let’s dive in and make your garden a bird’s favorite spot!

Credit: www.moonbow.world
Choosing Materials
Choosing the right materials is key to building a bird feeder that lasts and keeps birds safe. The materials must resist weather and not harm birds. Some options work better than others. Understanding different types helps you pick the best supplies for your project.
Safe And Durable Options
Wood is a top choice for bird feeders. It is strong and natural. Cedar and pine resist rot well. Avoid treated wood with chemicals that birds can eat.
Plastic containers also work. Use thick, sturdy plastic to last outdoors. Clear plastic lets you see the seed level inside.
Metal parts add strength. Aluminum or stainless steel resist rust. Avoid sharp edges to keep birds safe.
Recycled And Natural Supplies
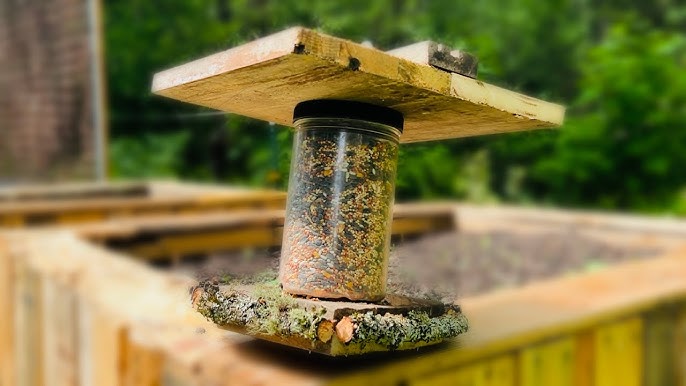
Recycling helps the environment and saves money. Old jars, milk cartons, or tin cans can become bird feeders. Clean all containers well before use.
Natural materials like pine cones, gourds, and bamboo make creative feeders. They blend well in gardens and attract more birds.
Use twine or wire to hang feeders. Choose materials that won’t break easily in wind or rain.

Credit: www.youtube.com
Selecting Feeder Types
Choosing the right type of bird feeder is important for attracting different birds. Each feeder suits certain bird species and food types. The design also affects how easy the feeder is to fill and clean. Understanding the main feeder types helps you pick the best one for your garden or backyard.
Tube Feeders
Tube feeders are long, cylindrical containers with small feeding ports. They hold seeds like sunflower and mixed seeds. These feeders attract small birds such as finches and chickadees. Tube feeders protect seeds from rain and keep birds safe while feeding. They are easy to hang and refill.
Platform Feeders
Platform feeders are flat surfaces that hold various food types. Birds like cardinals, doves, and jays enjoy these feeders. They offer space for ground-feeding birds to perch and eat. Platform feeders are simple to make and clean. You can place different foods like seeds, fruits, and nuts on them.
Suet Feeders
Suet feeders hold blocks of suet, a high-energy food for birds. Woodpeckers, nuthatches, and wrens love suet. These feeders often have wire cages to hold the suet block. Suet feeders are great in cold weather because they provide extra energy. They attract insect-eating birds that other feeders may miss.
Basic Tools Needed
Gathering the right tools is the first step to creating a homemade bird feeder that lasts. Having the basic tools on hand simplifies the process and helps you build something sturdy and attractive. Let’s look at what you’ll need before you start cutting, assembling, and finishing your feeder.
Cutting And Assembling Tools
Sharp cutting tools make shaping wood or plastic easier and safer. A handsaw or a jigsaw works well for cutting pieces to size. If you don’t have these, strong scissors or a craft knife might do for lighter materials.
For assembly, you’ll need a hammer and some nails or a screwdriver with screws. These fasteners hold your feeder together firmly so it can withstand the weather. Don’t forget a measuring tape or ruler; precise measurements help avoid wasted materials and frustration.
Clamps can be a huge help too, especially if you’re working alone. They keep parts in place while you nail or screw them together. Have you ever tried to hold pieces steady with one hand while hammering with the other? Clamps save you from that struggle.
Painting And Finishing Supplies
Protecting your feeder with paint or sealant extends its life outside. Water-based outdoor paint is a good choice because it’s safe for birds and easy to clean up. Choose bright colors to attract feathered visitors or natural tones to blend with your garden.
You’ll need a few paintbrushes in different sizes—small ones for details and larger ones for broad surfaces. Don’t skip sandpaper; smoothing rough edges before painting prevents splinters and helps the paint stick better.
Consider a clear wood sealant if you prefer a natural wood look. It shields the feeder from rain and sun without hiding the wood grain. Have you thought about how often you want to repaint or reseal? Planning for maintenance keeps your feeder looking great for seasons to come.
Step-by-step Building Process
Building your own bird feeder can be a rewarding experience that connects you with nature right in your backyard. The process is straightforward and enjoyable, even if you’re new to DIY projects. Let’s walk through the key stages that will help you create a bird feeder that’s both functional and charming.
Preparing Materials
Start by gathering all the materials you’ll need. Basic supplies include untreated wood or recycled containers, bird-friendly seeds, nails or screws, a hammer or screwdriver, and some strong string or wire for hanging.
Choose materials that won’t harm birds. Avoid treated wood or toxic paints. Think about the size of birds you want to attract—smaller feeders suit finches, while larger ones can welcome sparrows or cardinals.
Have you checked your toolbox recently? Sometimes, the right screwdriver or a fresh box of nails makes all the difference. Prepare everything on a clean workspace for easy access.
Assembly Instructions
Begin by cutting your wood or container to the desired size. A simple platform feeder or a classic box with a roof works well for most birds.
Use nails or screws to secure the parts together firmly. Stability is crucial; a shaky feeder won’t last long outdoors.
Drill small holes in the base for drainage. This prevents water from pooling and spoiling the seeds. Next, attach the string or wire securely to the top for hanging.
Think about how weatherproof your feeder is. If you want birds to visit even during rain, adding a slanted roof can protect the seeds and keep birds dry.
Adding Finishing Touches
Now that your feeder is assembled, you can personalize it. Sand rough edges to protect birds’ feet and give it a smooth finish.
Paint or decorate using non-toxic, water-based paints if you want to add color. Remember, bright colors like red or yellow attract certain birds, but keep safety in mind.
Fill the feeder with seeds suitable for your local birds—sunflower seeds, millet, or mixed blends work well. Place your feeder in a safe spot, visible but sheltered from predators.
Have you considered adding a small perch or a seed catcher? These little details can make your feeder more inviting and reduce waste.
Attracting Birds
Attracting birds to your homemade feeder makes your garden lively and beautiful. Birds need food that matches their tastes and easy access to it. Understanding what seeds to use and where to place the feeder helps bring more birds to your space. This guide explains simple tips to attract birds effectively.
Choosing The Right Seeds
Different birds prefer different seeds. Use a mix to attract a variety of birds. Black oil sunflower seeds are popular because many birds like them. Millet is good for smaller birds such as sparrows and finches. Nyjer seeds attract finches and small songbirds. Avoid seeds that birds do not eat, like large cracked corn or wheat. Fresh seeds keep birds coming back. Store seeds in a cool, dry place to keep them fresh.
Placement Tips
Place your feeder where birds feel safe. Near trees or bushes is ideal because birds use them for cover. Keep feeders away from places where predators can hide. Make sure feeders are visible from a distance. Avoid placing feeders too close to windows to prevent bird collisions. Set feeders at a height that is easy for birds to access but hard for cats. Clean feeders regularly to keep birds healthy and happy.
Maintenance Tips
Keeping your homemade bird feeder in good shape helps attract birds and keeps them safe. Regular maintenance ensures the feeder lasts longer and stays clean. It also prevents mold and bacteria that can harm birds. Follow these simple tips for cleaning, refilling, and fixing your feeder.
Cleaning The Feeder
Clean your bird feeder every two weeks or more often in wet weather. Use warm water and mild soap to remove dirt and old seeds. Rinse well to remove all soap. Let it dry completely before refilling. Avoid harsh chemicals that can harm birds.
- Disassemble the feeder if possible for better cleaning.
- Use a brush to scrub hard-to-reach areas.
- Check for mold or fungus and clean immediately.
Refilling And Repairing
Refill your feeder with fresh seeds regularly to keep birds coming back. Remove old or wet seeds to avoid spoilage. Check for cracks, loose parts, or damage. Fix small cracks with waterproof glue or replace broken parts. Secure hanging hooks and perches for bird safety.
- Use seeds suitable for local birds.
- Replace seeds before they run out completely.
- Inspect feeder weekly during heavy bird visits.
Creative Design Ideas
Creative design ideas can turn a simple homemade bird feeder into a charming centerpiece for your garden or balcony. Adding a personal touch not only makes your feeder unique but also attracts more birds by blending with your outdoor space. You can have fun experimenting with colors, shapes, and decorations to fit your style and the needs of your feathered visitors.
Personalizing Your Feeder
Think about what makes your outdoor space special and reflect that in your bird feeder. You could paint it with bright colors or patterns that match your garden’s theme. Adding your name or a fun message with weatherproof markers can make it truly yours.
Using recycled materials like old teacups, mason jars, or wooden boxes adds character and helps the environment. Have you ever tried attaching small mirrors or shiny objects? Birds are curious and often attracted to reflective surfaces, but keep it subtle to avoid startling them.
- Use non-toxic paints for safety
- Add small hooks for hanging extra treats like suet or fruit
- Include a perch that suits the size of birds in your area
Seasonal Decorations
Seasonal touches can keep your bird feeder looking fresh and inviting all year round. In spring, try attaching faux flowers or bright ribbons to welcome the new arrivals. During autumn, small pine cones or acorns add a rustic feel that blends with falling leaves.
Winter is a perfect time to add pops of color with red berries or a dusting of fake snow for a cozy look. You might even hang tiny holiday ornaments if you want to celebrate the festive season with your feathered friends.
- Switch decorations to match holidays or seasons
- Keep materials safe and non-toxic for birds
- Remove decorations if they interfere with feeding
What seasonal element could you add that would surprise both you and the birds? Trying new designs keeps the experience fun and helps you connect with nature in your own creative way.

Credit: www.youtube.com
Frequently Asked Questions
What Materials Do I Need For A Homemade Bird Feeder?
You need simple materials like wood, nails, glue, and birdseed. Recycled items like plastic bottles or milk cartons also work well. Choose safe, non-toxic materials to protect birds. These items are easy to find and budget-friendly for DIY projects.
How Do I Attract Birds To My Homemade Feeder?
Place your feeder in a quiet, safe spot near trees or shrubs. Use popular birdseed like sunflower seeds or millet. Keep the feeder clean and refill regularly. Providing fresh water nearby helps attract more birds to your feeder.
Can I Make A Bird Feeder Without Special Tools?
Yes, you can use household items like scissors and glue. Simple feeders can be made from pine cones, toilet paper rolls, or plastic bottles. No advanced tools are needed, making it a great project for all ages and skill levels.
How Often Should I Clean My Homemade Bird Feeder?
Clean your feeder every two weeks or more often if it gets dirty. Use warm soapy water and rinse well to prevent mold or disease. Regular cleaning keeps birds healthy and encourages them to visit your feeder.
Conclusion
Creating a homemade bird feeder is simple and rewarding. Birds bring joy and beauty to any garden. Use everyday materials to craft your feeder. Encourage more birds to visit your yard. Enjoy watching them while they eat. It’s a fun project for all ages.
Plus, it’s a great way to recycle. Share this activity with friends and family. They’ll love it too. Start today and experience the magic of nature. Your garden will soon be alive with colorful birds. Enjoy every moment of it.