Do you want to bring a new spark to your backyard and attract more birds than ever before? Electrifying your bird feeder is a simple way to do just that.
Imagine watching colorful birds visit your feeder even on chilly evenings or during those dull winter days. In this guide, you’ll discover easy steps to power up your feeder safely and effectively. Keep reading to learn how to transform your bird-watching experience and make your garden the favorite spot for feathered friends.

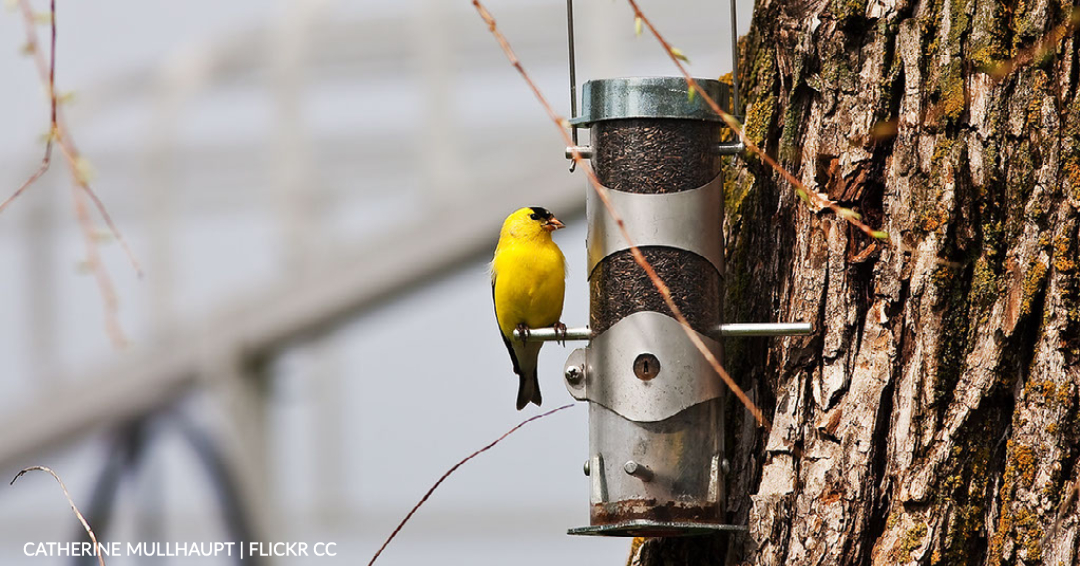
Credit: www.youtube.com
Benefits Of Electrifying Bird Feeders
Electrifying your bird feeder can transform your backyard into a lively sanctuary for birds. It offers several practical benefits that improve your feeding experience and protect your investment. Understanding these benefits will help you decide if electrification is the right upgrade for your feeder.
Increase Bird Activity
Adding a gentle electric current can encourage more birds to visit your feeder regularly. The mild warmth or movement created by electrification can make the feeder more attractive, especially during colder months. Have you noticed that birds tend to avoid cold, static feeders? Electrifying helps keep the feeding area inviting and lively.
Deter Pests And Squirrels
One of the biggest challenges with bird feeders is unwanted visitors like squirrels and other pests. Electrifying your feeder creates a safe but effective barrier that discourages these intruders without harming the birds. This means you spend less time cleaning up spilled seed and more time enjoying the birds that truly belong there.
Enhance Feeder Durability
Electric feeders often come with sturdier designs or can be retrofitted to improve their lifespan. The added electrical components can help prevent damage caused by pests gnawing or harsh weather conditions. Have you ever replaced a feeder because of wear and tear? Electrification can reduce that hassle and save you money over time.
:max_bytes(150000):strip_icc()/GettyImages-2127194441-cb7cb448aa164688aee85075217155d4.jpg)
Credit: www.thespruce.com
Choosing The Right Feeder For Electrification
Choosing the right bird feeder is key to successful electrification. Not all feeders suit this upgrade. The feeder must handle electric components safely and effectively. Consider several factors like material, design, and safety to pick the best one. This will protect birds and keep your feeder working well.
Material Considerations
Choose feeders made from durable, weather-resistant materials. Metals like stainless steel work well but avoid those that rust easily. Plastic feeders should be thick and sturdy to hold wiring. Wood can be used but must be treated against moisture and decay. The material must not conduct electricity dangerously.
Design Features To Look For
Pick a feeder with simple shapes and smooth surfaces. Avoid complex parts that make wiring tricky. Look for feeders with removable panels or sections for easy access. A design with enough space inside helps fit electric elements. The feeder should allow good bird access without risking contact with wires.
Safety Aspects
Safety is crucial for birds and humans. The feeder must keep electrical parts away from moisture and rain. Use feeders that allow insulation of wires and connections. Avoid sharp edges that can damage wiring or harm birds. Ensure the feeder does not cause electric shock risks. Proper grounding and low-voltage power supply add safety.
Essential Tools And Materials
Getting ready to electrify your bird feeder means gathering the right tools and materials. This step sets the foundation for a smooth installation and a feeder that works safely and efficiently. Knowing exactly what you need will save time and avoid frustration.
Electrical Components Needed
- Low-voltage transformer:Powers the feeder without risk of harming birds.
- Outdoor-rated extension cord:Weatherproof and durable for safe power delivery.
- LED grow lights or heat lamps:Choose based on whether you want to attract birds or keep the feeder ice-free.
- Waterproof connectors and electrical tape:Protect connections from moisture and corrosion.
- Timer switch:Automate the lighting or heating schedule.
Choosing components designed for outdoor use is crucial. Have you checked if your local store stocks UL-listed outdoor electrical parts? It’s a small detail that can prevent big problems.
Basic Tools For Installation
- Screwdrivers (flathead and Phillips):Essential for securing light fixtures and connectors.
- Wire strippers:Make clean cuts and strip insulation without damaging wires.
- Drill with bits:Handy for mounting brackets or making holes for wiring.
- Measuring tape:Helps position lights and cords accurately.
- Zip ties and mounting clips:Keep cords neat and safely out of the way.
Having these tools ready prevents last-minute trips to the hardware store. Think about the last time you started a project without all the right tools—didn’t it slow you down?
Safety Gear
- Insulated gloves:Protect your hands from electrical shocks.
- Safety goggles:Shield your eyes when drilling or handling wires.
- Non-slip shoes:Help maintain balance when working on ladders or uneven ground.
- First aid kit:Always good to have nearby, just in case.
Prioritize your safety above all. Have you ever underestimated the need for protective gear during a simple DIY task? A small precaution can save you from unexpected injuries.
Credit: www.michiganaudubon.org
Step-by-step Electrification Process
Electrifying your bird feeder is a smart way to keep bird food from freezing during colder months. This process is straightforward but requires attention to detail to ensure safety and functionality. Let’s break down the key actions you need to take to get your feeder warm and welcoming for feathered friends.
Preparing The Feeder
Start by choosing a feeder made of a material that can handle gentle heating, like metal or thick plastic. Remove any old seed and thoroughly clean the feeder to avoid mold or bacteria growth once heated.
Check for cracks or weak spots that might worsen with heat. You want a sturdy base before adding any electrical components.
Installing The Heating Element
Select a low-wattage heating pad or a flexible heat tape designed for outdoor use. Attach it carefully around the feeder’s seed container or base using waterproof tape or zip ties.
Make sure the heating element covers enough surface area to prevent seed from freezing but doesn’t block feeding ports. Have you considered the feeder’s shape and how heat will spread evenly?
Wiring And Power Setup
Use outdoor-rated extension cords and waterproof connectors to link the heating element to a power source. Position cables so they avoid water exposure and don’t create tripping hazards.
Consider adding a timer or thermostat to control when the heating element turns on, saving energy and preventing overheating. Does your setup allow easy access for adjustments?
Testing The System
Before filling the feeder with seed, plug in the system and monitor how the heating element warms up. Use a thermometer to check the surface temperature, aiming for a gentle warmth—not hot enough to damage the feeder or harm birds.
Observe the feeder over several hours to ensure consistent heat distribution and check for any electrical issues like flickering or unusual smells. How confident do you feel about your setup’s safety and effectiveness?
Safety Tips For Electrified Feeders
Electrifying your bird feeder adds convenience and helps keep birds safe from pests. Safety is key to avoid risks like shocks or fires. Follow simple guidelines to protect yourself and the birds. Regular care ensures your feeder works well all year.
Avoiding Electrical Hazards
Use outdoor-rated cords and plugs designed for wet conditions. Keep all electrical parts away from water sources. Install a ground-fault circuit interrupter (GFCI) to stop shocks. Make sure wires are not frayed or damaged. Secure cords to prevent tripping or chewing by animals. Always unplug the feeder before cleaning or fixing it.
Weatherproofing Techniques
Cover electrical connections with waterproof tape or boxes. Use silicone sealant around entry points to block moisture. Choose a feeder made from rust-resistant materials. Position the feeder in a spot shielded from heavy rain and snow. Keep power cords elevated and away from puddles or ice. Replace weatherproof covers regularly to maintain protection.
Regular Maintenance
- Check wires and plugs for damage each month.
- Clean the feeder often to avoid mold and bacteria.
- Test the electrical parts to ensure they work correctly.
- Tighten loose connections to prevent sparks or shorts.
- Remove debris or nests that could interfere with wiring.
- Store the feeder indoors during extreme weather or winter.
Alternative Electrification Methods
Looking beyond traditional wiring can open up creative ways to electrify your bird feeder. Alternative electrification methods offer flexibility and ease, especially if you want to avoid complex installations or if your feeder is placed far from power sources. These options let you keep your feeder lively and inviting without hassle.
Solar-powered Options
Solar panels can be a smart choice for powering your bird feeder. They capture sunlight during the day and convert it into energy to keep lights or heating elements active.
You can find compact solar kits designed specifically for outdoor use. These kits often include rechargeable batteries that store energy, allowing the feeder to stay powered even after the sun sets.
Think about the placement of your feeder: does it get enough direct sunlight? If not, a solar option might underperform. But in sunny spots, it’s low maintenance and eco-friendly.
Battery Operated Solutions
Batteries offer a simple and portable power source for your feeder. You can use rechargeable or disposable batteries depending on your preference and convenience.
Small LED lights or heating pads can run effectively on battery power. Just remember to check and replace batteries regularly to avoid interruptions.
If you want to avoid frequent battery changes, consider a feeder with a built-in battery compartment designed for easy access. This way, you won’t waste time dismantling your setup.
Maximizing Bird Visits With Added Features
Maximizing bird visits to your feeder makes your outdoor space lively and enjoyable. Small changes can attract more birds and keep them coming back. Adding simple features enhances the feeder’s appeal and creates a welcoming spot for birds. Bright lights, movement detection, and water sources all help make your feeder a favorite place.
Incorporating Lights
Lights draw birds during dawn and dusk. Soft, warm lights mimic natural conditions and help birds find food. Use solar-powered LED lights to save energy and avoid wiring hassles. Position lights to avoid glare that scares birds. Gentle illumination extends feeding time and brings more visitors.
Using Motion Sensors
Motion sensors activate lights or sounds when birds approach. They create a safer, dynamic environment. Sensors can also deter unwanted animals without harming birds. Choose sensors with adjustable sensitivity to fit your backyard size. This feature encourages birds to visit often and feel secure.
Adding Water Sources
Birds need water for drinking and bathing. Adding a small water dish or fountain near the feeder attracts more species. Keep water clean and fresh to maintain interest. Moving water, like a bubbler, catches bird attention better than still water. This simple addition supports bird health and increases visits.
Frequently Asked Questions
How Do I Electrify A Bird Feeder Safely?
Use low-voltage wiring and waterproof connections. Avoid exposed wires to protect birds and prevent short circuits. Consult electrical guidelines for outdoor use.
What Materials Are Needed To Electrify A Bird Feeder?
You need low-voltage LED lights, solar panels or batteries, weatherproof wiring, and connectors. Choose bird-safe, durable materials for outdoor conditions.
Can Electrifying A Feeder Attract More Birds?
Yes, gentle lighting can attract birds during low light. It also deters pests and adds visibility for bird watchers.
How Do I Power An Electrified Bird Feeder?
Power options include solar panels, rechargeable batteries, or low-voltage power supplies. Solar is eco-friendly and ideal for outdoor feeders.
Conclusion
Electrifying your bird feeder can enhance your backyard’s charm. It’s simple and effective. Birds feel safe, and pests stay away. You enjoy more birdwatching moments. Remember to follow safety guidelines. Choose the right materials and tools. Your feathered friends will thank you.
Watch them flock to your feeder with joy. This project is doable for anyone. With patience, you can succeed. Enjoy the process and the rewards. Your garden will become a lively sanctuary. A perfect spot for relaxation and nature appreciation.
Happy birdwatching!