Have you ever wanted to bring more life and color to your backyard? Building your own bird feeder is a simple and rewarding way to attract beautiful birds right outside your window.
Imagine watching different bird species visit daily, filling your space with cheerful chirps and vibrant feathers. In this guide, you’ll discover easy steps to create a bird feeder that suits your style and needs. By the end, you’ll have a unique feeder that not only helps local birds but also turns your outdoor space into a lively sanctuary you’ll love.
Ready to get started? Let’s dive in!
Choosing The Right Materials
Choosing the right materials is key to building a sturdy bird feeder. The materials must resist weather and be safe for birds. Picking good wood and tools makes the building process easier and the feeder more durable. Think about where you will place the feeder. Outdoor conditions affect material choice. This section covers the best wood types and tools, plus extra supplies you will need.
Wood Types And Tools
Wood is the best material for bird feeders. It is natural and safe for birds. Some woods last longer outside. Cedar and redwood are top choices. They resist water and insects well. Pine is cheaper but less durable. Avoid treated wood with chemicals. These can harm birds.
Use simple tools to build your feeder. A saw cuts wood to size. Sandpaper smooths rough edges. A hammer and nails or screws hold parts together. A drill can make holes for screws or hanging. Choose tools that you are comfortable using.
Additional Supplies Needed
Besides wood and tools, other supplies help complete your feeder. Use waterproof glue for extra strength. Outdoor paint or sealant protects wood from rain. Choose non-toxic paint safe for birds. Small hooks or wire help hang the feeder. Birdseed is the main attraction, so pick fresh seed suitable for local birds.
- Waterproof wood glue
- Non-toxic outdoor paint or sealant
- Small hooks or sturdy wire
- Sandpaper (medium and fine grit)
- Birdseed mix for local birds
Designing Your Bird Feeder
Designing your bird feeder sets the stage for attracting colorful birds to your garden. A well-thought design offers birds easy access to food and a safe resting spot. It also blends nicely with your outdoor space. Consider shape, size, and materials before building. These factors affect which birds visit and how often.
Simple Designs For Starters
Start with a basic shape like a platform or tube feeder. Simple designs need fewer tools and less time. Use wood or recycled materials for easy crafting and durability. Keep openings large enough for birds to reach seeds. Avoid sharp edges that can hurt them. Basic feeders attract many common backyard birds.
- Platform feeder: flat base with raised edges
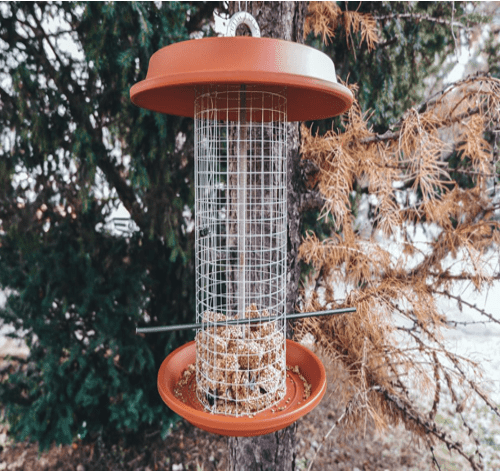
- Tube feeder: clear cylinder with small holes
- Shelf feeder: narrow ledge attached to a tree or post
Customizing For Different Birds
Different birds prefer different feeder styles and seeds. Small birds like finches need tiny perches and fine seed. Larger birds like cardinals prefer sturdy perches and bigger seed. You can add features to suit your feathered friends.
- Add perches of varying sizes for different birds
- Use mesh sides for peanuts or sunflower seeds
- Include a roof to protect seeds from rain
- Paint feeder in natural colors to blend with nature
Custom designs encourage more bird visits. Experiment with shapes and seed types to find your garden’s favorites.
Cutting And Preparing Parts
Cutting and preparing the parts is a crucial phase when building your bird feeder. Getting your measurements right and ensuring clean cuts will make assembly easier and improve the feeder’s durability. This step sets the foundation for a feeder that both you and the birds will appreciate.
Measuring And Marking
Accurate measurements are the backbone of any woodworking project. Use a reliable tape measure and mark your wood clearly with a pencil or chalk. Mark twice, cut once is more than a saying—it’s the rule that saves you from wasted material and frustration.
Consider the size of the birds you want to attract. Smaller birds need narrower perches and openings, while bigger birds require sturdier parts. Mark all pieces on the wood before you start cutting to keep everything consistent.
Safe Cutting Techniques
Safety should be your top priority while cutting. Always wear protective goggles and gloves to shield yourself from dust and splinters. Secure the wood firmly with clamps before cutting to prevent slipping and accidents.
Use a sharp saw blade to make clean cuts, which helps the pieces fit together better. If you’re new to cutting wood, practice on scrap pieces first to build confidence. Have you ever felt that rush of satisfaction when a perfectly straight cut fits seamlessly? That feeling comes from careful preparation and attention to safety.
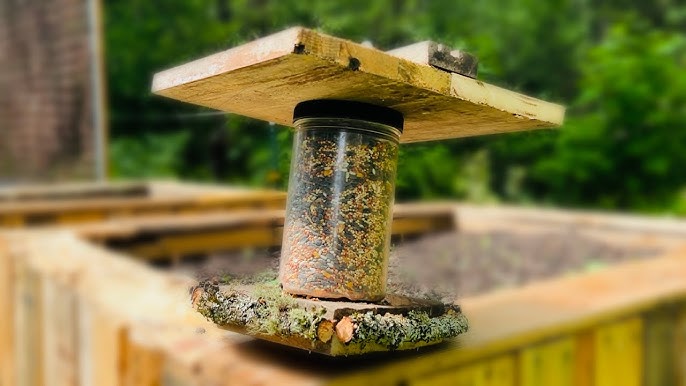
Credit: greengoddess.co.nz
Assembling The Feeder
Assembling the bird feeder is where your project begins to take shape. This stage requires careful attention to ensure the feeder is sturdy and functional. Proper assembly helps keep the feeder safe for birds and durable outdoors. Follow simple steps to join parts and create feeding spaces.
Joining Pieces Securely
Start by aligning all wooden or plastic parts carefully. Use wood glue or waterproof adhesive for a strong bond. Clamp pieces together and let them dry fully. Nails or screws add extra strength, especially for heavier feeders. Make sure each joint fits tightly without gaps. Sand rough edges to avoid splinters. Check stability by gently shaking the structure. A solid frame prevents wobbling and damage.
Adding Feeding Ports
Feeding ports let birds access the seeds easily. Cut holes or slots in the feeder walls with a drill or saw. The size depends on the bird species you want to attract. Small holes suit finches and chickadees; larger ones fit cardinals or doves. Smooth the edges of feeding ports to protect birds’ beaks. Attach small perches under each hole to help birds land. Position ports evenly around the feeder for balance. This design allows multiple birds to feed at once.
Finishing Touches
Finishing touches bring your bird feeder project to life. They not only enhance its appearance but also protect it from weather and wear. Paying attention to these final details ensures your feeder lasts through many seasons, inviting feathered friends year after year.
Sanding And Smoothing
Start by sanding all surfaces with medium-grit sandpaper to remove rough edges and splinters. Smooth wood feels safer for birds and looks more polished. Don’t rush this step—taking your time here prevents injuries to birds and makes painting easier.
Focus on corners and edges, especially around openings and perches. A well-sanded feeder reduces the chance of birds getting hurt or your hands getting scratched when refilling. After sanding, wipe the feeder with a damp cloth to remove dust, making sure the surface is clean before painting.
Painting And Sealing
Choose non-toxic, water-based paint designed for outdoor use to protect your feeder from rain and sun. Bright colors can attract birds, but keep in mind that subtle, natural tones may blend better with your garden. Paint in thin layers, allowing each coat to dry before applying the next to avoid drips and uneven coverage.
Seal the paint with a clear, non-toxic outdoor sealant to add an extra layer of protection. This helps prevent peeling and extends the life of your feeder. Have you considered how the type of paint and sealant affects not just durability but also the safety of your visiting birds?

Credit: www.youtube.com
Placing And Maintaining
Placing and maintaining your bird feeder properly can make a huge difference in attracting a variety of birds and keeping them safe. The right spot encourages frequent visits, while careful upkeep ensures the feeder stays a healthy food source. Let’s look at how to choose the best locations and keep your feeder clean and full.
Best Locations For Feeders
Choose a spot visible from your favorite window so you can enjoy watching the birds. Place the feeder near shrubs or trees to offer birds quick shelter from predators and bad weather.
Avoid areas close to busy walkways or noisy equipment to prevent scaring the birds away. Sunlight helps keep the seed dry, but too much direct sun can spoil it faster. Finding a balance is key.
Have you noticed that birds prefer feeders near natural cover? I once moved my feeder closer to a small hedge, and the variety of visitors doubled within days.
Cleaning And Refilling Tips
Keep your feeder clean to stop mold and bacteria from harming the birds. Wash it with warm, soapy water every two weeks or more often if you see dirt buildup.
Rinse thoroughly and let it dry completely before adding new seed. Wet seed clumps together and can spoil quickly, making birds sick.
Refill the feeder in small amounts to keep the food fresh and reduce waste. Check daily during busy seasons and after bad weather to ensure there’s always enough food.
Have you ever found old, damp seeds at the bottom of your feeder? Removing these promptly keeps your feeder inviting and healthy for every feathered visitor.

Credit: www.youtube.com
Frequently Asked Questions
What Materials Do I Need To Build A Bird Feeder?
To build a bird feeder, you’ll need wood, screws, a saw, sandpaper, and a drill. Optionally, use non-toxic paint for color. Ensure you have a measuring tape and a pencil for accurate cuts. These materials are easily found at local hardware stores or online.
How Do I Choose The Best Location For My Bird Feeder?
Choose a location that’s safe from predators and has good visibility. Place it near trees or shrubs for cover. Avoid placing it too close to windows to prevent bird collisions. Make sure it’s accessible for refilling and cleaning.
What Types Of Food Should I Use In A Bird Feeder?
Use seeds like sunflower, safflower, or millet to attract various birds. Suet cakes are great for winter feeding. Avoid bread as it provides little nutritional value. Clean and refill the feeder regularly to maintain freshness and hygiene.
How Can I Maintain My Bird Feeder?
Regularly clean your bird feeder with warm, soapy water to prevent mold and bacteria. Check for wear and repair any damage promptly. Refill it with fresh seeds and remove any old or wet food. This keeps the feeder safe and inviting for birds.
Conclusion
Building a bird feeder brings nature closer to your home. It invites birds to visit and sing. You can enjoy watching them every day. The process is simple and fun to try. Use safe materials to protect the birds. Place the feeder where birds feel safe.
Keep it clean to help birds stay healthy. Your garden will feel more lively and bright. Start building today and enjoy the peaceful moments. A little effort brings many happy bird visits.