If you love watching hummingbirds visit your feeder, you know how frustrating it can be when ants and other bugs spoil the fun. You want to keep these tiny visitors happy and safe while making sure your feeder stays clean.
That’s where a moat comes in—a simple, clever trick that creates a bug-free zone around your feeder. You’ll discover easy steps to make a moat that works like magic. Keep reading, and you’ll learn how to protect your hummingbird feeder and enjoy those beautiful birds without any unwanted guests stealing the show.
Choosing The Right Hummingbird Feeder
Choosing the right hummingbird feeder is key to attracting these tiny birds to your garden. The feeder must suit the environment and keep the nectar safe. A good feeder also makes it easy to build a moat around it, protecting the nectar from ants and other pests.
Materials And Design
Pick feeders made from durable, non-toxic materials like glass or BPA-free plastic. These hold nectar safely without leaching chemicals. Bright red parts attract hummingbirds, but avoid feeders with yellow. Yellow can attract bees and wasps instead.
Look for designs that are easy to clean. Nectar can spoil quickly, so regular cleaning is important. Feeders with wide openings help you clean and fill them without hassle. Simple shapes also reduce places where mold can grow.
Size And Capacity
Choose a feeder size based on how many hummingbirds visit. Small feeders hold about 4 ounces and suit a few birds. Larger feeders hold 8 to 12 ounces for a busy garden.
Smaller amounts of nectar are safer. Nectar spoils faster in warm weather. Refill often to keep nectar fresh and healthy.
Why Use A Moat For Your Feeder
Using a moat for your hummingbird feeder is a smart way to keep unwanted visitors away and protect the nectar you’ve carefully prepared. It’s a simple addition that can make a big difference in how often you need to clean or refill your feeder. Have you ever noticed ants swarming your feeder, making it difficult for hummingbirds to feed? A moat might be the solution you didn’t know you needed.
Preventing Ants And Insects
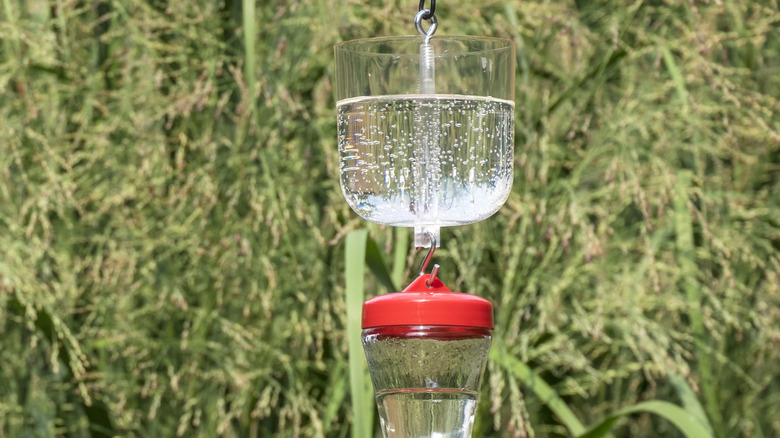
Ants are one of the most common pests that invade hummingbird feeders. They crawl up the feeder’s pole or hanger, attracted by the sweet nectar inside. A moat filled with water creates a barrier that ants and other crawling insects can’t cross.
This water moat stops ants from reaching the feeder without using harmful chemicals. It’s a natural and effective way to keep your feeder insect-free. You might be surprised how much longer your feeder stays clean once the ants are kept at bay.
Protecting The Nectar
Nectar is delicate and can spoil quickly if exposed to dirt, bugs, or direct sunlight. When ants and other insects invade, they can contaminate the nectar and cause it to ferment faster. A moat acts like a protective shield, reducing the chance of contamination.
By keeping ants away, the nectar stays fresher for longer periods, meaning you won’t need to change it as often. This can save you time and reduce waste. Have you noticed your nectar lasting longer after adding a simple water moat?
Materials Needed For A Moat
Creating a moat for your hummingbird feeder is a smart way to keep ants and other pests away. To build an effective moat, you’ll need a few key materials that can hold water securely and last outdoors. Gathering the right items before you start will save you time and ensure your moat works well.
Waterproof Containers
Choosing the right container is crucial because it needs to hold water without leaking. Small plastic or metal bowls, jar lids, or even shallow trays work great as waterproof containers. Look for something sturdy and weather-resistant to avoid cracks or rust.
I once used a simple plastic container from my kitchen, and it lasted all summer without any issues. You might want to check thrift stores for unique containers that fit perfectly under your feeder. Make sure the container is wide enough to create a barrier but not so large that it becomes difficult to maintain.
Sealants And Adhesives
Sealants and adhesives help keep your moat components in place and prevent water from leaking. Silicone sealant is ideal because it’s waterproof and flexible, making it perfect for outdoor use. You can also use waterproof glue to secure the container to your feeder’s base or pole.
Applying a thin bead of sealant around the edges of your container creates a tight seal that lasts through rain and wind. Have you ever tried using hot glue? It’s quick but less reliable over time, so silicone is a better choice if you want durability. Remember, the goal is to keep your moat water inside and away from ants, so don’t skip this step.

Credit: www.youtube.com
Step-by-step Moat Construction
Building a moat around your hummingbird feeder is a smart way to keep ants and other pests away. The process is straightforward and requires just a few materials you might already have at home. By creating a water barrier, you ensure the nectar stays fresh and your tiny visitors stay happy.
Preparing The Feeder Base
Start by choosing a stable, flat surface to place your hummingbird feeder. Clean the base thoroughly to remove any dirt or sticky nectar residue. This helps the moat container stick better and prevents leaks.
Consider the size of your feeder and pick a base wide enough to hold the moat container around it. If your feeder has a hanging hook, think about how the moat will fit without interfering with the hanging mechanism.
Attaching The Moat Container
Select a shallow, waterproof container that can hold water and fit snugly around your feeder’s base. You can use small plastic trays, lids, or even shallow bowls. Make sure it’s wide enough to create a moat but not so large that it looks out of place.
Place the container around the base of the feeder and check for a close fit. You want the water to form a continuous barrier. If needed, trim the edges of the container for a better fit or use a waterproof adhesive to attach it securely.
Sealing And Securing
Use a waterproof sealant or silicone glue to seal any gaps between the feeder base and the moat container. This prevents ants from sneaking through cracks. Apply the sealant carefully and allow it to dry completely before adding water.
Once sealed, fill the moat container with clean water. Check the water level daily and refill as needed. This simple step can dramatically reduce ant problems and keep your feeder humming smoothly.
Maintaining Your Moat And Feeder
Maintaining your moat and hummingbird feeder keeps birds safe and healthy. Clean water and fresh nectar attract more hummingbirds. Regular care prevents mold, bacteria, and ants from spoiling the feeder.
Regular Cleaning
Clean the moat and feeder at least twice a week. Use warm water and mild soap. Rinse thoroughly to remove all soap residue. Scrub small parts with a soft brush to clear dirt and mold. Avoid harsh chemicals that can harm birds.
Remove any dead insects or debris from the moat daily. Check for algae growth and clean it away. Dry all parts before refilling to prevent mold. Clean the feeder more often in hot weather to keep nectar fresh.
Refilling Nectar And Water
Refill the moat with fresh water every two days. This stops mosquitoes from breeding. Use plain water without additives or chemicals. Refill the feeder with fresh nectar regularly. Make nectar by mixing four parts water to one part sugar.
Do not use honey or artificial sweeteners. Discard leftover nectar after two days to avoid spoilage. Keep the nectar cool and shaded. Monitor the nectar level often to keep hummingbirds happy and healthy.
Alternative Moat Designs
Alternative moat designs help protect hummingbird feeders from ants. These designs vary in materials and setup but share the same goal. A good moat keeps ants away without harming the birds. Choose a design that fits your budget and convenience.
Using Commercial Ant Moats
Commercial ant moats are ready-made solutions for feeders. They usually hang above or attach below the feeder. These moats hold water, stopping ants from crossing. Many are made from durable plastic or metal. They are easy to clean and refill. Commercial moats save time and effort. They come in various sizes for different feeders.
Diy Options With Household Items
Household items can create effective ant moats too. Simple containers like bottle caps or small bowls work well. Fill them with water and place them under the feeder. Another idea is to use plastic lids or shallow dishes. You can also use tape to attach these containers. Make sure the moat stays full of water. Change the water often to prevent mosquito breeding. These DIY moats cost little and are easy to replace.
Tips For Attracting More Hummingbirds
Attracting more hummingbirds to your feeder can make your garden lively and colorful. Small changes in how you set up the feeder and prepare nectar can invite these tiny birds to visit often. Understanding their preferences helps create a perfect hummingbird-friendly spot.
Feeder Placement
Place the feeder where hummingbirds feel safe. Choose a quiet spot away from strong winds. Hummingbirds like shade during hot midday hours. Position the feeder near flowers with bright colors. These colors catch their attention quickly.
Keep the feeder visible but protected from predators like cats. Hang it at eye level or slightly higher. This makes it easier for hummingbirds to spot and reach the nectar. Clean feeders regularly to avoid mold and bacteria. Fresh feeders attract more visits.
Nectar Recipes
Making your own nectar is simple and cost-effective. Use four parts water to one part white granulated sugar. Boil the water before mixing to dissolve sugar completely. Let the nectar cool before filling the feeder. Avoid adding honey, artificial sweeteners, or red dye.
Change the nectar every few days, especially in warm weather. Fresh nectar keeps hummingbirds healthy and encourages repeat visits. Store extra nectar in the refrigerator to keep it fresh longer. Clean the feeder each time you refill to prevent buildup.

Credit: m.youtube.com

Credit: www.kitchenparade.com
Frequently Asked Questions
What Is A Moat For A Hummingbird Feeder?
A moat is a water barrier around the feeder base. It prevents ants and other insects from reaching the nectar, keeping it clean and safe for hummingbirds.
How Do I Make A Moat For My Feeder?
Use a shallow dish filled with water under the feeder. Ensure the feeder hangs above without touching the water to block ants effectively.
Can A Moat Harm Hummingbirds Or Other Wildlife?
No, a water moat is safe for hummingbirds and most wildlife. It only blocks crawling insects and does not pose any risk to flying birds.
How Often Should I Refill The Moat Water?
Refill the moat water every few days or when it evaporates. Fresh water ensures continuous protection against ants and keeps the feeder hygienic.
Conclusion
Creating a moat for your hummingbird feeder is simple. It keeps ants away, ensuring your hummingbirds enjoy their meal. Use water or oil for the moat, whichever suits you. Regular maintenance is crucial for effectiveness. Clean the moat and feeder weekly.
This prevents clogging and contamination. Remember, a clean feeder attracts more hummingbirds. Watching them flutter and feed is rewarding. Enjoy the beauty they bring to your garden. Now, you’re ready to welcome these tiny, vibrant visitors. Happy hummingbird watching!