Do you have a regular bird feeder but no idea how to mount it on a pole? You’re not alone.
Many bird lovers want to enjoy watching birds up close, but struggle with fitting their feeders to poles. The good news? It’s easier than you think. In this guide, you’ll discover simple, practical steps to make your bird feeder fit securely on any pole.
Keep reading, and soon you’ll create a perfect spot to attract colorful birds right in your yard.

Credit: www.youtube.com
Choosing The Right Bird Feeder
Choosing the right bird feeder is key to fitting it securely on a pole. The right feeder ensures stability and attracts more birds. Understanding different types, materials, and sizes helps you pick the best one for your setup.
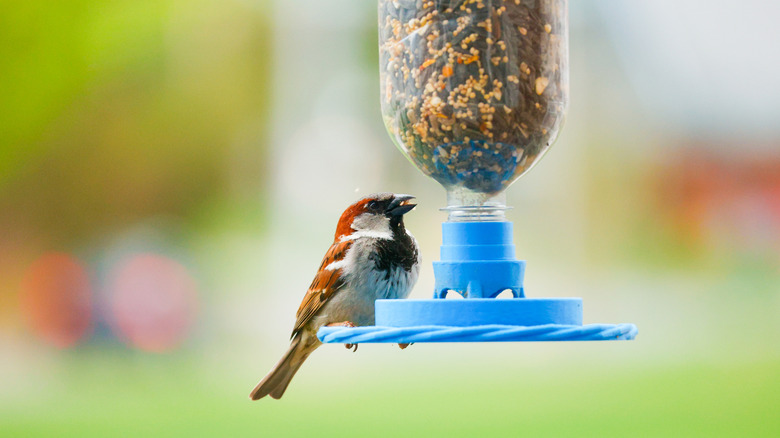
Types Of Bird Feeders
Bird feeders come in many shapes. Tube feeders are long and narrow, perfect for small birds. Hopper feeders hold more seed and offer shelter from rain. Platform feeders are flat and open, ideal for larger birds. Suet feeders attract woodpeckers and insect-eaters. Choose a type that matches the birds you want to attract and fits your pole setup.
Material Considerations
Feeders are made from plastic, metal, or wood. Plastic feeders are light and easy to clean. Metal feeders last long and resist squirrels. Wood feeders look natural but need regular care. Pick a material that suits your weather and maintenance habits. A sturdy material keeps the feeder steady on the pole.
Size And Weight Factors
Consider the feeder’s size and weight for pole fitting. Large feeders hold more seed but weigh more. Heavy feeders need strong poles and secure mounting. Small feeders are lighter and easier to install. Balance the feeder size with the pole’s strength. This keeps the feeder safe and stable for birds.
Credit: dengarden.com
Selecting A Suitable Pole
Selecting a suitable pole is essential for mounting a regular bird feeder securely. The right pole keeps the feeder stable and safe from wind or animals. It also affects how easy it is to fill and clean the feeder. Consider the material, height, and weather resistance of the pole before installation.
Pole Materials
Choose a pole made from strong materials that can hold the feeder’s weight. Common options include metal, wood, and PVC. Metal poles last longer and resist damage. Wooden poles look natural but may rot over time. PVC poles are lightweight and easy to handle but may not support heavy feeders well.
Height And Stability
Pick a pole height that keeps the feeder out of reach of pets and pests. Typically, 5 to 6 feet is ideal. The pole must be stable enough to stand firm in the ground. Use a wide base or bury the pole deep to prevent tipping. Stability ensures birds can feed without disturbance.
Weather Resistance
Poles face rain, sun, wind, and snow. Choose materials that resist rust, rot, and fading. Metal poles with a powder-coated finish resist rust well. Treated wood can withstand moisture longer. PVC poles do not rust or rot but may crack under extreme cold. Weather resistance ensures the pole lasts through all seasons.
Preparing The Feeder For Mounting
Preparing your regular bird feeder to fit a pole is the crucial first step to ensure it stays secure and functions well. This process involves making the feeder ready for mounting by removing any parts that might get in the way, adding brackets for support, and reinforcing the structure where needed. These adjustments help you avoid wobbling feeders and frustrated birds.
Removing Unnecessary Parts
Start by examining your bird feeder for any parts that could interfere with mounting. This often includes hanging hooks, suction cups, or decorative elements that aren’t designed for pole attachment.
Carefully detach these parts with a screwdriver or pliers. Removing them creates a flat, stable surface that will sit flush against the pole, reducing movement and wear over time.
Have you noticed how some feeders come with multiple hooks? Choosing the right spot to remove can make your mounting job much easier.
Adding Mounting Brackets
Next, you’ll want to add brackets that can hold the feeder firmly on the pole. You can buy universal mounting brackets or repurpose metal strips for this task.
Attach the brackets to the feeder’s base or sides using screws that fit the feeder’s material. Make sure the brackets are positioned evenly to distribute weight and keep the feeder balanced.
Adding brackets might feel like a small step, but it’s what keeps your feeder steady during windy days or when birds land.
Drilling And Reinforcing
Drilling holes into your feeder allows you to secure the mounting brackets with bolts or screws. Use a drill bit suitable for the feeder’s material—metal, plastic, or wood.
After drilling, reinforce the area around the holes with washers or small metal plates. This prevents cracking or splitting, especially if the feeder will hold heavy seed loads.
Have you ever seen a feeder crack after a strong gust? Reinforcement helps avoid that problem and extends your feeder’s life.
Attaching The Feeder To The Pole
Attaching your regular bird feeder securely to a pole is essential to keep it stable and safe from wind or curious animals. A well-fixed feeder ensures your feathered visitors have a reliable spot to enjoy their meals. Let’s look at some straightforward ways you can fasten your feeder to a pole without hassle.
Using U-bolts And Clamps
U-bolts and clamps offer a very sturdy hold for bird feeders on poles. These metal fasteners wrap around the pole and tighten against the feeder’s mounting bracket or base. You just need a wrench or screwdriver to secure them firmly, making the feeder almost impossible to wobble or fall off.
They work well for poles with smooth surfaces and feeders with flat attachment points. If you want a lasting solution that handles wind and weight well, this method is a solid choice. Have you tried using U-bolts for other outdoor fixtures? They tend to be reliable and easy to adjust.
Securing With Zip Ties
Zip ties are a quick and budget-friendly option to attach your feeder to the pole. Simply wrap a few heavy-duty zip ties around both the feeder and the pole, then pull tight. It’s surprising how strong this simple plastic tool can be when applied correctly.
Zip ties are best for lightweight feeders and temporary setups. You can easily replace or adjust them without tools, which is handy if you move your feeder often. Just make sure to use UV-resistant zip ties if your feeder will be outside for long periods.
Alternative Fastening Methods
Sometimes, you might need a different approach depending on your pole or feeder design. Velcro straps, hose clamps, or even a metal bracket screwed into the pole can work well. Each offers varying degrees of strength and ease of removal.
Think about what materials you have on hand and how often you want to move or clean your feeder. Have you considered using a swivel mount? It allows the feeder to spin gently in the breeze, reducing wear and tear on the attachment point.
Ensuring Stability And Safety
Ensuring the bird feeder stays stable and safe is essential. A shaky feeder can scare birds away or cause spills. Also, a secure setup protects birds from falling or predators. Taking time to stabilize the feeder improves bird visits and keeps them safe.
Balancing The Feeder
Start by checking the feeder’s weight distribution. Make sure it hangs evenly on the pole. Use a level tool to confirm balance. If the feeder tilts, add weight to the lighter side or adjust the hanger. A well-balanced feeder prevents tipping and spilling seed.
Preventing Sway And Movement
Wind and birds landing can cause the feeder to sway. Use bungee cords or zip ties to secure the feeder to the pole. Attach them loosely to allow slight movement but stop strong swinging. Another way is adding a stabilizer rod below the feeder. This reduces side-to-side motion, making feeding easier for birds.
Protecting Against Predators
Keep predators like cats and squirrels away by placing baffles below the feeder. These cone-shaped guards block climbing animals. Use smooth poles that are hard to climb. Position the feeder away from branches or fences predators can jump from. These steps help keep birds safe while they feed.
Maintenance Tips For Longevity
Keeping your bird feeder securely attached to a pole is only half the battle. To enjoy many seasons of happy bird visits, you need to care for your feeder regularly. Proper maintenance can prevent damage, keep birds safe, and save you money on replacements.
Regular Cleaning
Cleaning your bird feeder often is essential. Old seeds and droppings can attract mold and harmful bacteria that hurt birds.
Use a simple mix of water and mild soap to scrub the feeder. Rinse well and let it dry completely before refilling. How long has it been since you last cleaned your feeder?
Inspecting Mounts And Fasteners
Check the pole mounts and fasteners regularly for rust, looseness, or cracks. Even small issues can cause the feeder to fall.
Try gently shaking the feeder to test stability. Tighten screws or replace worn parts immediately. You don’t want your feathered friends to get startled by a sudden drop.
Weatherproofing Techniques
Exposure to rain, sun, and wind can wear down your feeder and pole quickly. Applying a weatherproof sealant to wooden poles or metal protectors on mounts can extend their life.
Covering the feeder during harsh weather or bringing it indoors during winter also helps. What simple step can you take today to protect your feeder from the next storm?
Credit: dengarden.com
Frequently Asked Questions
How Do I Attach A Bird Feeder To A Pole?
To attach a bird feeder to a pole, use a pole adapter or mounting bracket. Ensure the adapter fits both the feeder and pole snugly. Tighten any screws or fasteners to secure the feeder. This method keeps the feeder stable and prevents it from tipping over.
What Tools Are Needed For Fitting A Feeder To A Pole?
You’ll need a drill, screwdriver, and possibly a wrench. These tools help secure the feeder to the pole. Make sure to have the appropriate screws and brackets. Always check the compatibility of your feeder with the pole.
Can Any Bird Feeder Fit On A Pole?
Not all bird feeders are pole-compatible. Some require specific adapters or mounts. Check the feeder’s design and instructions. Most feeders can be adapted with the right accessories. Consider purchasing universal mounts for versatility.
Why Mount A Bird Feeder On A Pole?
Mounting a feeder on a pole deters predators and reduces spillage. It provides a stable feeding platform and better viewing. Pole-mounted feeders are less accessible to squirrels and other animals. This setup is also easier to maintain and refill.
Conclusion
Making a regular bird feeder fit a pole is simple and fun. Use the right tools and follow the steps carefully. Secure the feeder tightly to keep birds safe. This setup helps you enjoy watching birds every day. Try it yourself and see how easy it is.
Your garden will feel lively with feathered friends visiting often. Keep the feeder clean and check it regularly for stability. Small changes make a big difference in bird feeding. Enjoy nature right outside your window!