Looking to invite more feathered friends into your garden? An octagon bird feeder might just be the perfect addition.
Not only does it offer a charming aesthetic, but it also provides ample space for birds to perch and enjoy their meals. Imagine relaxing in your backyard, watching a variety of colorful birds visit your custom-made feeder. Sounds delightful, right?
You might think creating an octagon bird feeder is a complex task, but it’s simpler than you expect. In this guide, you’ll discover step-by-step instructions that will take you from a pile of wood to a beautiful, functional feeder. Get ready to unleash your creativity and craft a piece that’s both practical and pleasing to the eye. Dive in, and let’s transform your backyard into a bird haven!

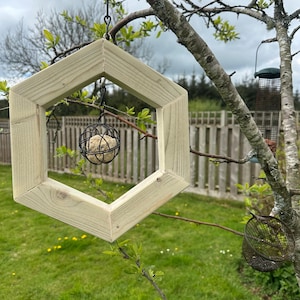
Credit: www.bigw.com.au
Materials Needed
Gathering the right materials is the first step to crafting your octagon bird feeder. Having everything on hand before you begin will save you time and keep your project smooth. Think about the tools and supplies you’ll need to create a sturdy, attractive feeder that birds will love.
Wood And Cutting Supplies
Choose a durable wood like cedar or pine, which resists weather and lasts longer outdoors. You’ll need enough wood to cut eight equal panels for the octagon shape, plus a base and roof pieces.
- 1-inch thick cedar or pine boards
- Measuring tape and pencil for precise cuts
- A saw suitable for straight and angled cuts (miter saw recommended)
- Sandpaper or a sanding block to smooth edges
Think about how precise your cuts need to be to ensure the octagon fits perfectly together. Have you checked your saw blade for sharpness? It can make a big difference.
Fasteners And Adhesives
Strong joints keep your bird feeder sturdy through wind and rain. You’ll want screws that won’t rust and wood glue for extra hold.
- Exterior-grade wood screws (1¼ inch size works well)
- Wood glue suitable for outdoor use
- Drill and screwdriver
Consider how you’ll position screws to avoid splitting the wood. Pre-drilling holes can help with this, and it’s a step often overlooked.
Finishing Touches And Accessories
Finishing your bird feeder protects the wood and attracts feathered visitors. Choose a safe, non-toxic finish that won’t harm wildlife.
- Exterior water-based wood sealant or paint
- Paintbrushes or foam brushes
- Optional hooks or chains for hanging
- Clear plastic or mesh for seed protection (optional)
Have you thought about where you want to place your feeder? The finish you pick can help it blend into your yard or stand out as a charming focal point.
Tools Required
Gathering the right tools is the first step to creating a sturdy and attractive octagon bird feeder. Having the proper equipment not only makes the job easier but also ensures precision and safety. Before you start, make sure your workspace is organized and you have everything at hand to avoid interruptions.
Measuring And Marking Tools
Accuracy is key when cutting the pieces for an octagon shape. Use a reliable tape measure to get exact lengths for each side. A carpenter’s square helps keep your angles right, which is crucial for an octagon.
Don’t forget a pencil for marking measurements clearly. These simple tools keep your cuts neat and your feeder balanced.
Cutting Tools
A jigsaw or circular saw is essential for cutting wood into the eight sides of the octagon. If you prefer finer cuts, a handsaw can work too, but it requires more effort and patience.
Remember to wear safety goggles to protect your eyes from sawdust. Sharp blades make the job smoother and prevent splintering.
Assembly Tools
To join the pieces, you’ll need a drill and screwdriver. These help you insert screws firmly, ensuring your feeder stays together through all seasons.
Wood glue adds extra strength to your joints. Clamps are useful to hold pieces in place while the glue dries, making your work more precise.
Finishing Tools
Sandpaper or a sanding block smooths rough edges, preventing injuries to birds and making your feeder look polished. Consider using a paintbrush if you plan to add weatherproof paint or sealant.
Finishing touches protect your feeder and extend its life outdoors. Have you thought about how a well-finished feeder might attract more birds to your garden?
Choosing The Wood
Choosing the right wood is key for building a strong octagon bird feeder. Wood must resist weather and last through seasons. The quality of wood affects how safe and comfortable the feeder is for birds.
Wood types vary in durability, weight, and cost. Picking the best one helps avoid repairs and keeps the feeder looking good. It also makes building easier, especially for beginners.
Types Of Wood Suitable For Bird Feeders
- Cedar:Naturally resistant to rot and insects. Lightweight and easy to work with.
- Pine:Affordable and widely available. Needs sealing to protect from moisture.
- Redwood:Durable and weather-resistant. Usually more expensive but lasts longer.
- Teak:Highly durable and water-resistant. Best for long-lasting feeders but costly.
Wood Characteristics To Consider
- Durability:Wood should withstand rain, sun, and snow.
- Weight:Lightweight wood is easier to hang and handle.
- Workability:Choose wood that cuts and sands smoothly.
- Non-toxicity:Avoid treated wood that can harm birds.
Preparing The Wood For Use
Start by selecting straight, knot-free boards. Cut pieces carefully to fit the octagon shape. Sand edges smooth to prevent splinters. Use a non-toxic sealant to protect wood without harming birds.
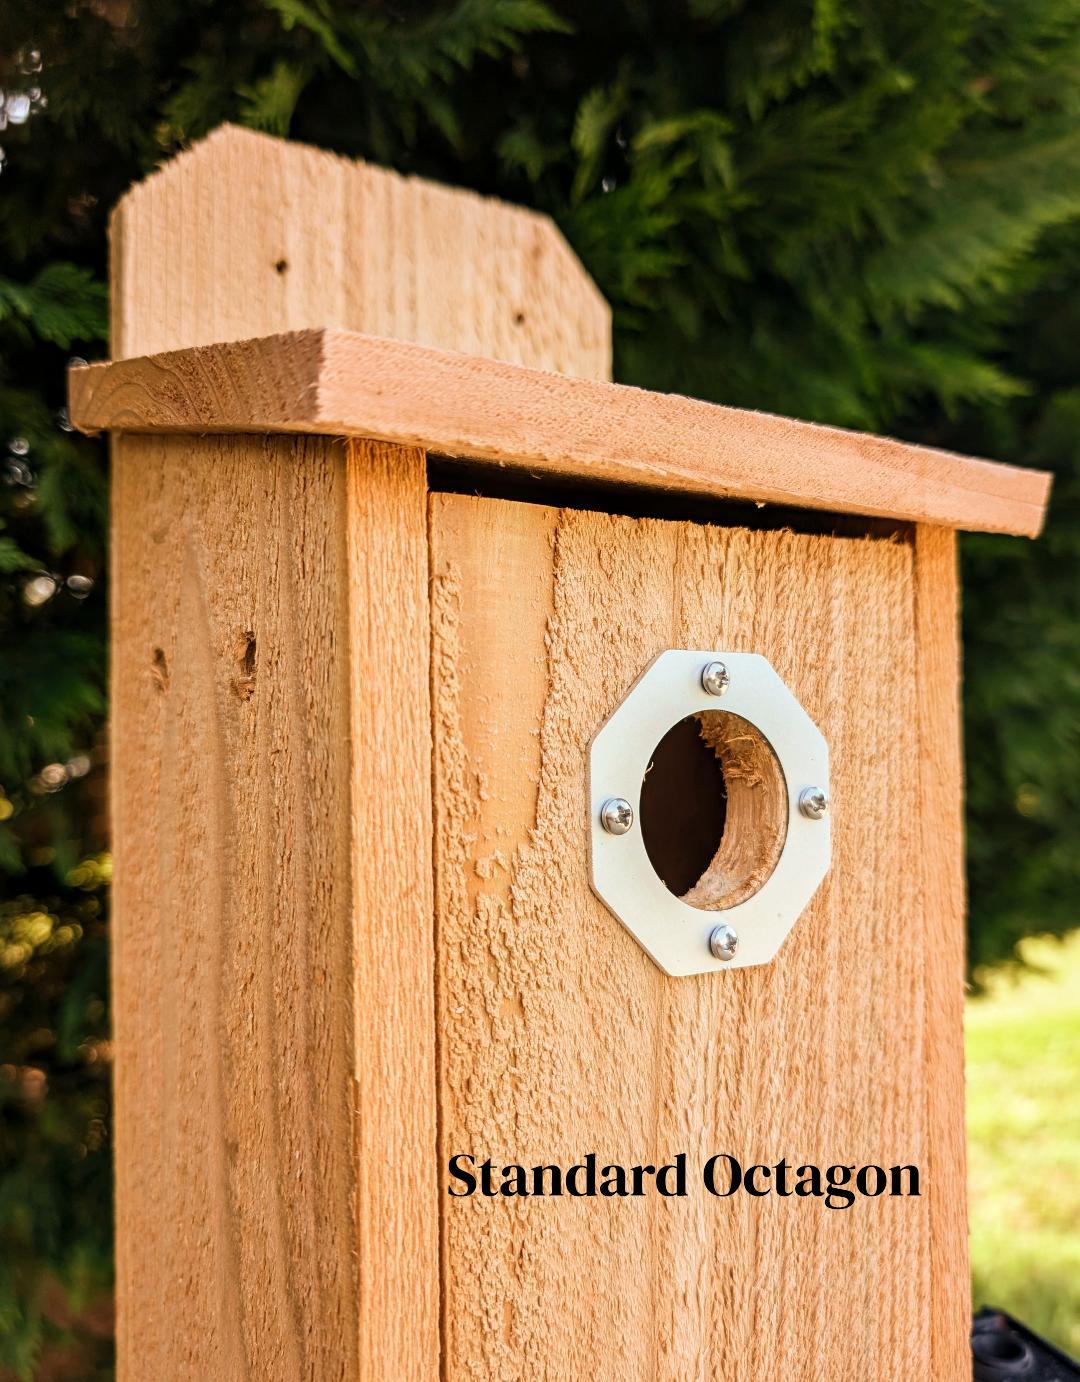
Credit: www.etsy.com
Cutting The Octagon Base
Cutting the octagon base is a key part of building your bird feeder. This base will hold the entire structure together. Accuracy in cutting ensures the feeder looks neat and stays stable. Use the right tools and measure carefully to get perfect angles.
Wood pieces for the base should be strong and weather-resistant. Plywood or cedar work well. Mark the wood clearly before cutting to avoid mistakes. The octagon shape means eight equal sides and angles.
Measuring And Marking The Wood
Start by drawing a square on your wood piece. The size depends on how big you want the feeder. Use a ruler and pencil to mark the edges. Then, find the center of the square.
Next, draw lines from each corner to the opposite corner. This will create an “X” across the square. The points where the lines cross the edges mark the octagon’s corners. Connect these points with straight lines to form the octagon shape.
Choosing The Right Tools
A miter saw or jigsaw works best for cutting the octagon base. A miter saw gives clean, angled cuts. A jigsaw is good for more detailed cuts but requires a steady hand. Always wear safety goggles and gloves while cutting.
Making The Cuts
- Set the saw blade to a 22.5-degree angle for each cut.
- Cut along the marked lines carefully.
- Take your time to avoid splintering the wood.
- Sand the edges smooth after cutting.
Check the base for even sides and adjust if needed. A well-cut base supports your bird feeder’s roof and sides perfectly.
Building The Frame
Building the frame is the foundation of your octagon bird feeder. A strong, well-measured frame will ensure your feeder holds up against weather and curious birds alike. Focus on precision and stability to create a structure that lasts and looks great in your garden.
Choosing The Right Wood
Start by picking wood that resists moisture and decay. Cedar and redwood are excellent choices because they naturally withstand outdoor conditions. Avoid softwoods like pine unless you treat them with a weatherproof sealant.
Think about the thickness, too—1×4 or 1×6 boards offer good strength without being too heavy. Have you checked what wood is available locally? Sometimes local options are more cost-effective and environmentally friendly.
Measuring And Cutting The Pieces
Precision matters here. An octagon has eight equal sides, so measure carefully to keep all sides identical. Use a protractor or an angle finder to cut each board at a 22.5-degree angle for perfect corners.
Double-check each cut before moving on. Cutting mistakes are frustrating but easy to avoid with patience and the right tools. If you’re unsure about your saw skills, practice on scrap wood first.
Assembling The Octagon Frame
Lay out all eight pieces on a flat surface before fastening. This helps you see the shape and catch any measurement errors early. Use wood glue on the edges for extra strength before nailing or screwing the pieces together.
Clamp the corners to hold everything tight while the glue dries. This step makes a huge difference in frame sturdiness. Would you rather have a loose frame that wobbles or one that stays solid through wind and rain?
Reinforcing The Structure
Add corner braces or small wooden blocks inside the frame corners for extra support. These reinforcements prevent the frame from twisting over time. You can use metal brackets if you prefer a more industrial look or stronger hold.
Check each joint for gaps and fill them with wood filler to keep pests out. A tight frame keeps your bird feeder safe and inviting for feathered visitors.
Assembling The Roof
Assembling the roof of your octagon bird feeder is a key step. It protects the feeder from rain and keeps the birds dry. A well-built roof also gives the feeder a neat, finished look. This part needs attention to detail for a strong and lasting structure.
Start by preparing the roof pieces. Cut eight triangular panels that fit the octagon shape. Each piece must have the same size and angle to fit perfectly.
Aligning The Roof Panels
Place two roof panels edge to edge. Check that the edges meet smoothly. Use clamps or hold them by hand to keep steady. Repeat this for all panels.
Joining The Panels Securely
Use wood glue along the edges where panels meet. Press them together firmly. Add small nails or screws for extra strength. Let the glue dry for several hours.
Attaching The Roof To The Feeder Base
Position the assembled roof on top of the octagon feeder base. Make sure it fits evenly on all sides. Secure the roof with screws from the inside of the feeder. This keeps the screws hidden and the look clean.
Waterproofing The Roof
Apply a waterproof sealant or outdoor paint to the roof. Cover all surfaces, including edges and corners. This protects the wood from moisture and extends the feeder’s life.
Adding The Feeding Tray
Adding the feeding tray is an essential part of making an octagon bird feeder. The tray holds the birdseed and gives birds a place to land and eat comfortably. It needs to be sturdy and secure to support different bird sizes. The tray should also allow water drainage to keep the seeds dry and fresh. Proper design ensures birds visit often and enjoy their meal safely.
Choosing The Right Material For The Tray
Select materials that resist weather and wear. Wood is a popular choice because it blends well outdoors. Metal trays last longer but may get hot in the sun. Plastic is lightweight but can crack over time. Pick a material that fits your climate and feeder style.
Designing The Tray For Easy Drainage
Drainage holes prevent water buildup in the tray. Drill small holes evenly across the tray base. This stops seed rot and mold growth. Make sure holes are not too big to avoid losing seeds. Good drainage keeps birds healthy and happy.
Attaching The Tray To The Feeder Base
Secure the tray firmly to the octagon base. Use screws or strong adhesive for stability. Check that the tray is level and does not wobble. A steady tray gives birds a safe place to feed. Tight attachment prevents damage from wind or bird movement.
Adding A Protective Edge To The Tray
Build a small lip around the tray edge. This stops seeds from spilling over. The edge should be smooth to avoid bird injuries. A 1-2 inch raised border works well. It keeps the feeding area neat and seed-efficient.
Sanding And Finishing
Sanding and finishing are essential to make your octagon bird feeder look smooth and last longer. Proper sanding removes rough spots and sharp edges. Finishing protects the wood from weather and wear. This process also enhances the natural beauty of the wood. Take your time to ensure a neat and polished result.
Sanding The Wood
Start with medium-grit sandpaper to smooth all surfaces. Sand along the wood grain to avoid scratches. Focus on corners and edges to remove splinters. After that, use fine-grit sandpaper for a soft finish. Wipe the dust off with a clean cloth before moving on.
Choosing The Right Finish
Pick a finish that protects against rain and sun. Outdoor varnish or polyurethane works well. Look for water-resistant and UV-protective options. Avoid finishes with strong chemicals that might harm birds. A natural, non-toxic finish keeps the feeder safe and durable.
Applying The Finish
- Use a clean brush or cloth for even coating.
- Apply thin layers to avoid drips and runs.
- Let each coat dry completely before adding another.
- Lightly sand between coats for a smooth feel.
- Apply at least two coats for good protection.
Final Touches
Check all surfaces for rough spots after finishing. Sand lightly if needed and apply a last finish coat. Allow the feeder to dry fully in a dust-free place. Your octagon bird feeder is now ready to hang and enjoy.
Painting And Sealing
Painting and sealing your octagon bird feeder protects it from weather damage. It also makes the feeder look attractive and colorful. Using the right paint and sealant keeps the wood safe from rain, sun, and insects. This step helps the feeder last longer outside.
Choosing The Right Paint For Outdoor Use
Select paint made for outdoor wood projects. Look for water-resistant and non-toxic paint. Birds need safe materials around their food. Acrylic latex paint works well. It dries quickly and resists fading. Avoid paints with strong odors or harmful chemicals.
Applying Paint Evenly
Use a soft brush or small roller for smooth coverage. Paint all sides of the feeder, including edges and corners. Apply thin coats to prevent dripping. Let each coat dry fully before adding another. Two to three coats give the best protection and color.
Choosing A Sealant To Protect Your Feeder
Pick a clear, waterproof sealant to cover the paint. Sealants guard against rain and sun damage. Use a non-toxic, bird-safe option. Polyurethane or outdoor varnish works well. This layer keeps the wood safe and the paint fresh.
How To Apply Sealant Correctly
Apply sealant with a clean brush in thin layers. Cover all painted surfaces and edges carefully. Avoid pooling or thick spots. Allow the sealant to dry completely between coats. Two coats usually provide strong protection. Proper sealing extends your feeder’s life outdoors.
Mounting The Feeder
Mounting your octagon bird feeder correctly is key to attracting feathered friends and keeping your feeder stable. The right placement and mounting method can make a big difference in how often birds visit and how long your feeder lasts.
Choosing The Perfect Location
Pick a spot visible from your favorite window so you can enjoy watching the birds. Avoid areas exposed to strong winds or direct afternoon sun, as these can scare birds away or spoil the birdseed quickly.
Think about safety too—keep the feeder away from places where predators like cats can easily reach it. A good height is about 5 to 6 feet off the ground, which is comfortable for refilling and helps protect the birds.
Mounting On A Pole
A sturdy pole is a popular choice for mounting your octagon feeder. It keeps the feeder stable and away from ground predators. You can use a metal or wooden pole, but make sure it’s firmly anchored into the ground.
- Dig a hole about 1 to 2 feet deep for the pole.
- Use concrete or pack the soil tightly to secure it.
- Add a squirrel baffle below the feeder to keep pesky critters at bay.
This setup is practical and keeps your feeder accessible for maintenance.
Hanging The Feeder From A Tree Or Hook
If you have a strong tree branch or a sturdy hook, hanging your feeder is quick and effective. Use a durable wire or chain to suspend the feeder, allowing it to sway gently in the breeze, which can attract birds.
Make sure the feeder hangs at least 6 feet above the ground to stay out of reach of predators. Also, check the branch regularly to ensure it can support the feeder’s weight, especially after rain or snow.
Mounting On A Deck Or Balcony Railing
For those with limited yard space, mounting the feeder on a deck or balcony railing works well. Use brackets or clamp mounts designed for feeders to attach securely without damaging your railing.
This keeps the feeder close and convenient for refilling, plus you get a close-up view of visiting birds. Just ensure the feeder is stable and can’t tip over in windy conditions.
Tips For Attracting Birds
Attracting birds to your octagon bird feeder can turn your backyard into a lively sanctuary. Understanding what draws birds will help you create a welcoming spot they’ll visit again and again. Small changes in food choice, placement, and environment can make a big difference in who shows up.
Choose The Right Birdseed
Different birds prefer different seeds. Black oil sunflower seeds attract a wide variety of birds, including finches, chickadees, and cardinals. If you want to attract specific species, research their favorite foods and tailor your seed mix accordingly.
Try to avoid cheap seed mixes filled with filler seeds like millet and oats, as birds often ignore these and waste energy. Fresh, high-quality seed will keep birds coming back to your feeder.
Place Your Feeder Strategically
Location matters more than you might think. Place your feeder where you can see it easily from a window, but make sure it’s safe for birds. Avoid spots too close to windows to prevent collisions.
Consider putting the feeder near shrubs or trees. Birds feel safer when they have quick access to cover. But don’t put it too close; predators might use nearby branches to hide.
Keep The Feeder Clean
Dirty feeders can spread disease and deter birds. Clean your feeder regularly with warm, soapy water and rinse well. This simple step keeps your feeder inviting and safe for your feathered visitors.
Have you noticed birds avoiding your feeder? It might be time for a cleaning session.
Add Fresh Water
Birds need water for drinking and bathing. Adding a birdbath or a small water dish near your feeder can encourage more visitors. Make sure to change the water often to keep it fresh and free of algae.
Water can attract birds even when food doesn’t. Have you tried adding a water source to your feeding area?
Provide Shelter And Perches
Birds look for places to rest and hide from predators. Including perches on your feeder or nearby branches gives birds a comfortable spot to relax. Planting native shrubs or trees around the feeder adds natural shelter and attracts even more species.
Think about what your backyard lacks—could adding some plants or branches make it feel safer for birds?
Credit: www.etsy.com
Maintenance And Cleaning
Keeping your octagon bird feeder clean and well-maintained is key to attracting healthy, happy birds. Regular upkeep prevents mold, pests, and leftover seeds from spoiling the feeding area. It also extends the life of your feeder, saving you time and money in the long run.
Cleaning Frequency And Tools
Clean your bird feeder at least once every two weeks, or more often during wet weather. Use a soft brush or sponge and mild soap mixed with water to scrub all surfaces.
Rinse thoroughly to remove any soap residue. Avoid harsh chemicals that can harm birds or leave harmful traces.
Disassembling And Deep Cleaning
Take apart the feeder if possible to reach all corners and crevices. Pay close attention to small holes and perches where dirt tends to build up.
Soak parts in a vinegar-water solution for 10-15 minutes to kill bacteria and mold spores. This simple step can make a big difference in preventing diseases among your feathered visitors.
Inspecting For Damage And Repairs
After cleaning, check your feeder for cracks, loose screws, or worn-out paint. These small issues can let water in or make the feeder unstable.
Fix minor problems immediately to avoid bigger repairs later. You want your feeder to stay safe and inviting for birds throughout the seasons.
Frequently Asked Questions
What Materials Are Needed For An Octagon Bird Feeder?
You need wood panels, nails, wood glue, paint, and a saw. Also gather sandpaper, a drill, and hanging hardware. These materials ensure durability and easy assembly.
How Do You Cut The Wood For The Feeder?
Measure and mark wood into eight equal sections. Use a saw for precise, straight cuts. Sand edges smooth to prevent bird injury.
How To Assemble An Octagon Bird Feeder?
Attach the eight wood panels to form an octagon shape. Use wood glue and nails for stability. Secure the base and roof last.
What Type Of Paint Is Best For Bird Feeders?
Use non-toxic, water-based outdoor paint. It protects wood from weather and is safe for birds. Avoid toxic or oil-based paints.
Conclusion
Building an octagon bird feeder brings joy and nature closer. It uses simple steps anyone can follow. This project helps feed birds and decorate your yard. You can enjoy watching birds visit every day. Making your own feeder saves money and feels rewarding.
Try this easy craft and see the results yourself. Happy bird watching!