
Do you want to bring more birds to your backyard without spending a lot of money? Making a bird feeder out of scrap wood is easier than you think.
With just a few simple tools and leftover wood pieces, you can create a beautiful, functional feeder that attracts birds all year round. Imagine watching colorful birds up close while knowing you built something useful with your own hands. Keep reading, and you’ll discover step-by-step instructions that anyone can follow—even if you’ve never built anything before.
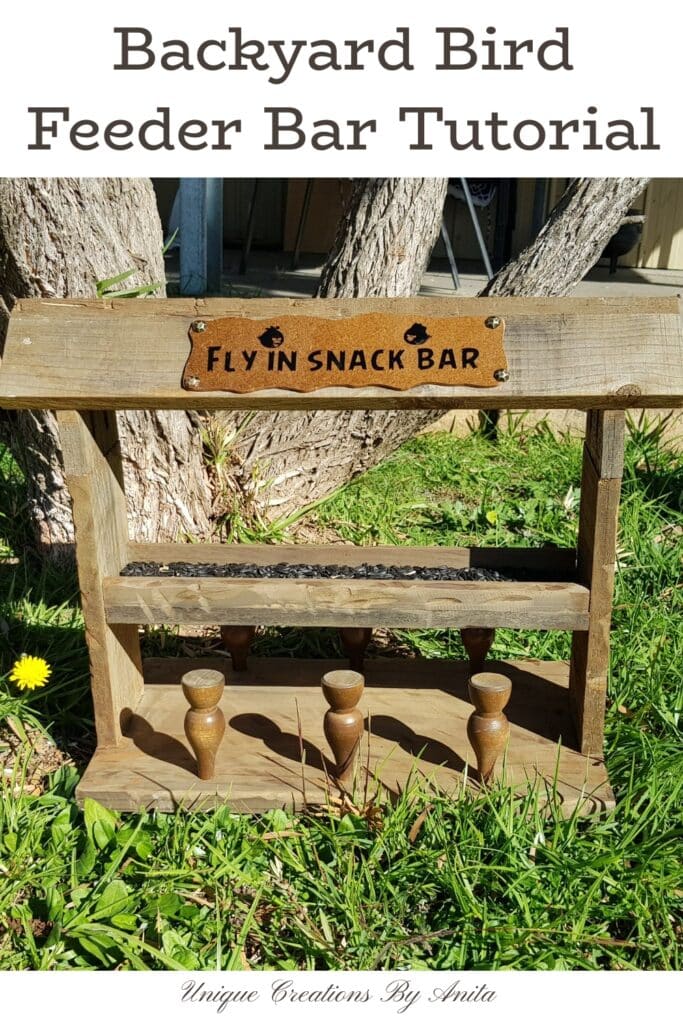
Your new bird feeder is just a few easy steps away!
Credit: uniquecreationsbyanita.com
Choosing The Right Wood
Choosing the right wood is important for building a strong bird feeder. The wood must last outside in all weather. It should be safe for birds and easy to work with. Picking the right scrap wood can save money and help the environment. Here is what to consider when selecting wood for your bird feeder.
Types Of Scrap Wood To Use
Look for clean, untreated wood pieces. Old furniture, pallets, or leftover wood from projects work well. Softwoods like pine are easy to cut but may not last long outside. Hardwoods like oak or maple are stronger and last longer. Avoid wood with paint or chemicals that can harm birds. Check the wood for cracks or rot. Choose wood that feels solid and smooth.
Wood Safety And Durability
Safety is key for the birds’ health. Avoid wood treated with chemicals or painted with toxic finishes. Natural wood is best. Cedar and redwood resist bugs and weather. Sand rough edges to prevent splinters. Seal the wood with bird-safe finishes to protect it from rain. Good wood will hold up through seasons and keep birds safe and happy.
Gathering Tools And Materials
Before you start building your bird feeder from scrap wood, gathering the right tools and materials is key. Having everything ready saves time and helps you stay focused on creating a sturdy and attractive feeder. It also makes the process more enjoyable and less frustrating.
Essential Tools
- Hammer:A reliable hammer is necessary for nailing pieces of wood together securely.
- Saw:Whether it’s a hand saw or a small power saw, you’ll need this to cut your scrap wood to the right sizes.
- Measuring Tape:Precise measurements ensure your bird feeder parts fit perfectly.
- Sandpaper:Smoothing edges prevents splinters and gives your feeder a neat finish.
- Drill:Handy for making holes if you want to hang your feeder or attach parts firmly.
- Screwdriver:Useful if you prefer screws over nails for extra durability.
Additional Supplies
- Scrap Wood:Look for untreated wood pieces like old pallets, leftover planks, or furniture scraps. Avoid pressure-treated wood as it can be harmful to birds.
- Wood Glue:Adds strength to joints and helps hold parts together before nailing or screwing.
- Wood Finish or Paint:Choose bird-safe, non-toxic finishes to protect your feeder from weather and add color.
- Nails and Screws:Have a variety of sizes on hand to match your design needs.
- Hooks or String:Needed if you plan to hang your bird feeder from a tree or pole.
Have you ever started a project only to realize you’re missing a key tool halfway through? That’s why preparing your workspace and materials upfront is crucial. What scrap wood do you have around that could become a bird’s new favorite spot?
Designing Your Bird Feeder
Designing your bird feeder is an exciting part of the project because it shapes how birds will interact with your creation. You want it to be both functional and inviting. Think about the space you have and the types of birds you want to attract before you begin building.
Simple Bird Feeder Styles
Start with basic designs that are easy to build and maintain. A flat platform feeder or a small box with an open front can work well. These styles allow birds to perch comfortably and access seeds without hassle.
Consider styles like:
- A tray feeder with raised edges to keep seeds from spilling.
- A hopper feeder that holds more seed and protects it from rain.
- A tube feeder with small holes for birds to peck through.
Choosing a simple style reduces the chances of mistakes during construction. It also means you can finish your feeder faster and start watching birds sooner.
Measuring And Planning
Before cutting any wood, measure carefully. Sketch your design on paper with exact dimensions. This makes the building process smoother and helps avoid wasted material.
Think about the size of the birds you want to feed. Smaller birds need narrower perches, while larger birds require sturdier platforms. Planning these details now saves frustration later.
Ask yourself:
- How much seed do I want the feeder to hold?
- Where will I place the feeder for best bird visibility and protection?
- Do I want to make the feeder easy to clean?
Taking time to plan can turn your scrap wood into a bird feeder that lasts and attracts a variety of feathered friends. What dimensions will work best for your backyard visitors?

Credit: www.youtube.com
Cutting And Preparing Wood Pieces
Cutting and preparing wood pieces is a crucial step in building a bird feeder from scrap wood. This stage sets the foundation for a sturdy and safe structure. Taking your time to carefully cut and smooth the wood ensures the feeder will last and be comfortable for birds to visit.
Safe Cutting Techniques
Always wear safety goggles and gloves to protect yourself from splinters and dust. Secure the wood firmly using clamps or a stable surface before cutting to prevent slips. Use a sharp saw—whether hand saw or power saw—because dull blades can cause uneven cuts and accidents.
Cut slowly and steadily, paying attention to your hand placement. If you’re new to sawing, practice on scrap pieces first to build confidence. Have you ever noticed how a clean cut makes assembly much easier? That’s why patience here pays off.
Sanding And Smoothing Edges
After cutting, the edges will likely be rough or splintered, which can hurt both you and the birds. Use medium-grit sandpaper to smooth the cut edges, then finish with fine-grit for a soft touch. Sand along the grain to avoid scratches and maintain wood integrity.
Don’t rush this step; rough edges can cause injuries and reduce the feeder’s durability. I once skipped sanding, and small splinters damaged the bird feeder’s paint and made it hard to handle. Taking a few extra minutes to sand can save you from bigger problems later.
Assembling The Feeder
Assembling the bird feeder brings your scrap wood pieces to life. This step shapes the structure and readies it for birds. Careful fitting and joining make the feeder strong and stable. Proper assembly ensures it lasts through all seasons. Follow simple actions to build a solid frame that holds birdseed safely.
Basic Assembly Steps
- Lay out all wood pieces on a flat surface.
- Start by attaching the base to the side panels.
- Align edges carefully to keep the shape square.
- Use clamps to hold pieces steady while working.
- Attach the roof pieces last for easy access.
- Check the fit of all parts before final fixing.
Securing Joints
- Use wood glue on all edges for strong bonds.
- Reinforce with nails or screws for extra support.
- Pre-drill holes to prevent wood from splitting.
- Make sure screws are flush with the wood surface.
- Double-check all joints are tight and stable.
- Let glue dry fully before moving the feeder.
Finishing Touches
Finishing touches are what transform your bird feeder from a simple wooden structure into a charming backyard attraction. These final steps not only improve the feeder’s appearance but also make it more durable and inviting for birds. Paying attention to details ensures your effort lasts through seasons and brings joy every time you watch the feathered visitors.
Painting And Sealing
Painting your bird feeder adds color and personality while protecting the wood from rain and sun damage. Choose non-toxic, water-based paints to keep the feeder safe for birds. Bright, natural colors like green or brown blend well with outdoor settings, but don’t hesitate to add a splash of your favorite shade.
After painting, apply a clear, weatherproof sealant to lock in the paint and shield the wood. This extra layer guards against moisture, preventing cracks and rot. Have you noticed how a sealed wood surface stays smooth and fresh even after heavy rain? That’s the power of sealing.
Adding Perches And Feeders
Birds need a comfortable place to land while they eat, so adding perches is essential. Use small dowels or branches securely attached near the feeding ports. Make sure they’re sturdy enough to support various bird sizes.
You can also customize the feeder by attaching small containers or trays for different types of seeds. This variety attracts a wider range of birds and keeps your feeder interesting. Think about which birds visit your area most often—what kind of perches and feeders would make them feel welcome?
Placing And Maintaining Your Feeder
Placing and maintaining your bird feeder is key to attracting birds and keeping them safe. Choosing the right spot helps birds find food easily. Regular cleaning keeps the feeder healthy and inviting. Both steps ensure birds visit often and stay healthy.
Ideal Locations
- Place the feeder near trees or shrubs for shelter.
- Keep it away from busy areas or pets.
- Choose a spot with some shade to protect seeds.
- Mount the feeder at least 5 feet above the ground.
- Ensure the feeder is visible from a window for easy watching.
Regular Cleaning Tips
- Clean the feeder every two weeks or more often in wet weather.
- Use warm water and mild soap to wash all parts.
- Rinse thoroughly to remove soap residue.
- Dry completely before refilling to avoid mold.
- Check for damage and repair or replace parts as needed.

Credit: www.reddit.com
Frequently Asked Questions
What Tools Do I Need To Build A Scrap Wood Bird Feeder?
You need basic tools like a saw, hammer, nails, sandpaper, and a drill. These tools help cut, assemble, and smooth the wood safely and effectively.
Which Types Of Scrap Wood Are Best For Bird Feeders?
Use untreated, weather-resistant wood like cedar or pine. Avoid painted or chemically treated wood to keep birds safe and ensure durability.
How Do I Protect The Bird Feeder From Weather Damage?
Apply a non-toxic, waterproof sealant to protect wood from rain and sun. This extends the feeder’s life and keeps birds safe.
What Bird Seeds Should I Fill In My Feeder?
Use mixed seeds like sunflower, millet, and cracked corn. These attract a variety of common backyard birds and provide good nutrition.
Conclusion
Creating a bird feeder from scrap wood is simple and fun. You can enjoy watching birds while helping the environment. This project uses materials you already have. It saves money and reduces waste. The birds will love visiting your homemade feeder.
You get a chance to learn and be creative. Plus, it adds a charming touch to your garden. Try it today and see the joy it brings. Your yard will soon become a lively bird hub. Happy birdwatching!