Are you ready to bring vibrant hummingbirds right to your window? Making a homemade hummingbird feeder is easier than you think, and it’s a wonderful way to enjoy these tiny, colorful visitors up close.
Imagine watching their delicate wings flutter as they sip sweet nectar you made yourself. In this guide, you’ll discover simple steps to create a feeder that attracts hummingbirds quickly and keeps them coming back. Let’s dive in and turn your outdoor space into a hummingbird paradise!
Materials Needed
Gathering the right materials makes building a homemade hummingbird feeder simple and fun. Choose items that are safe for birds and easy to clean. This helps keep the feeder attractive and healthy for hummingbirds.
Below are the basic supplies you need to start. You can also add decorative items to make your feeder unique and inviting.
Basic Supplies
- Clear plastic or glass bottle with a screw-on lid
- Small, bright red plastic flowers or red paint for feeding ports
- Thin metal or plastic tubing for feeding tubes
- Strong waterproof glue or silicone sealant
- Hook or wire for hanging the feeder
- Measuring cup or spoon for nectar preparation
- Clean water and white granulated sugar for nectar
Optional Decorative Items
- Colorful ribbons or strings to hang the feeder
- Small plastic or ceramic figurines to attach outside
- Waterproof stickers in nature or flower shapes
- Bright paint to decorate the bottle exterior
- Natural twigs or small branches for a rustic look
- Beads or buttons glued around the feeder base

Credit: www.kitchenparade.com
Choosing The Right Container
Choosing the right container is a key step in making a homemade hummingbird feeder. The container affects not only the feeder’s durability but also how easily the birds can access the nectar. Picking the right material and size can improve your chances of attracting these tiny visitors.
Glass Vs Plastic
Glass containers are sturdy and easy to clean. They don’t scratch easily, which helps prevent mold buildup that can harm hummingbirds. Plus, glass doesn’t leach chemicals into the nectar, making it safer for the birds.
Plastic containers, on the other hand, are lightweight and less likely to break if dropped. However, they can get scratched, and those scratches can harbor bacteria. If you choose plastic, pick thick, BPA-free options and change the nectar frequently to keep it fresh.
Size And Shape Considerations
The size of your container should match the number of hummingbirds you expect to visit. A small feeder (around 8 to 12 ounces) is easy to clean and refill, but if you have many hummingbirds, a larger one may save you trips.
Shape matters too. Narrow-neck bottles help reduce spillage and evaporation but might be harder to clean. Wide-mouth containers are easier to clean but may let nectar spill out more easily. Think about how often you want to maintain your feeder and what fits best in your outdoor space.
Creating The Feeding Ports
Creating the feeding ports is a key part of making a homemade hummingbird feeder. The ports allow the birds to reach the nectar safely and easily. Thoughtful design helps attract hummingbirds and keeps them coming back.
Number And Placement
Choose the right number of feeding ports. Too few may cause crowding. Too many can waste nectar. Most feeders work well with 3 to 5 ports.
Place the ports evenly around the feeder. This gives hummingbirds multiple access points. Space them about 2 to 3 inches apart. Keep ports at least 1 inch from the feeder’s bottom to avoid spills.
Sealing And Safety Tips
Seal each feeding port carefully. Use non-toxic silicone to prevent leaks. Avoid sharp edges around the holes. Sand or file the edges smooth for bird safety.
Check the ports regularly for damage. Replace or fix any rough spots. Clean the feeder often to stop mold growth. Safe, clean ports keep hummingbirds healthy and happy.
Making The Nectar
Making the nectar is a key part of creating a homemade hummingbird feeder. The right nectar attracts hummingbirds and keeps them healthy. It is important to prepare a simple, safe solution that mimics the natural nectar found in flowers. This section explains how to make the best nectar for your feeder.
Simple Sugar Water Recipe
Use plain white granulated sugar and clean water. Avoid honey or artificial sweeteners. Mix four parts water with one part sugar. For example, one cup of water and one-quarter cup of sugar.
Boil the water first to remove impurities. Stir in the sugar until it dissolves completely. Let the nectar cool before filling your feeder. This simple recipe provides energy for hummingbirds without harm.
Avoiding Harmful Ingredients
Do not add red dye or food coloring. These can be harmful to birds. Avoid using honey, as it can ferment and cause illness. Never use artificial sweeteners; they offer no nutrition.
Always use filtered or distilled water if possible. Tap water may contain chemicals that affect hummingbirds. Clean feeders regularly to prevent mold and bacteria growth. Fresh nectar helps keep hummingbirds safe and healthy.
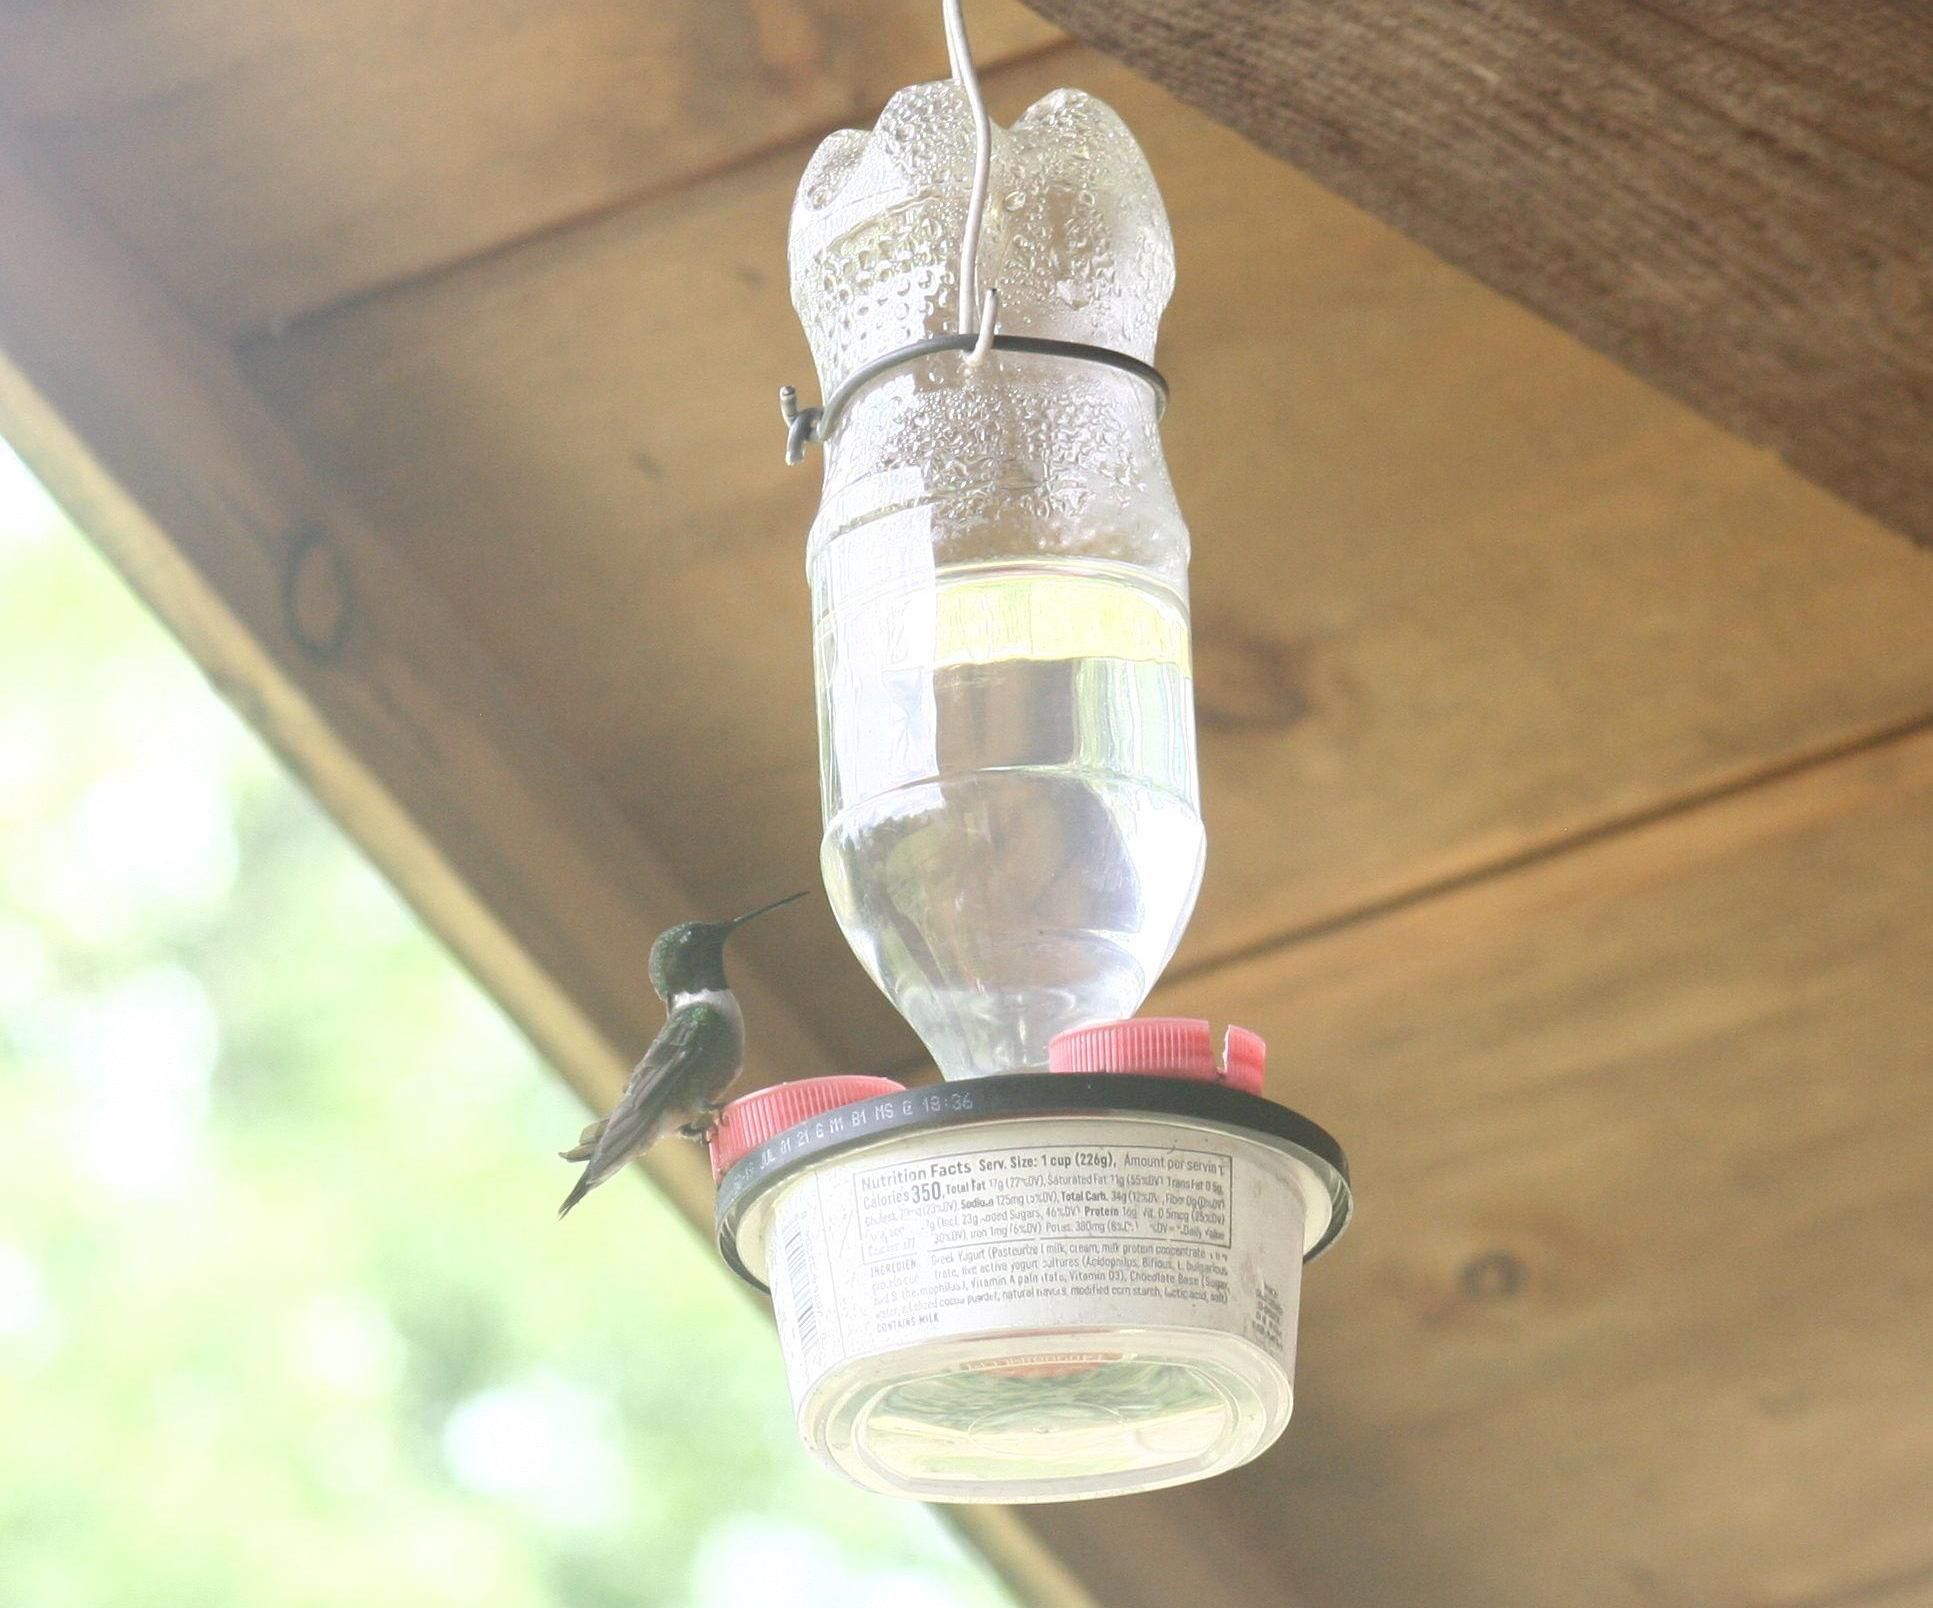
Assembling The Feeder
Assembling your homemade hummingbird feeder is where your project starts to come alive. This step is crucial because a well-assembled feeder ensures that the nectar is accessible and safe for the birds. Let’s focus on how to properly attach the base and make sure the feeder stays stable, so you won’t have to worry about spills or wobbling when the birds come to visit.
Attaching The Base
Begin by selecting a sturdy base that can hold the nectar container securely. A common choice is a shallow dish or a small plastic plate with holes punched in it for the birds to feed through.
Use waterproof glue or strong tape to attach the base to your nectar container. Make sure the glue is completely dry before adding any liquid to avoid contamination.
Check that the feeding holes are smooth around the edges; sharp edges can harm the hummingbirds. You might want to sand them lightly or cover them with a soft material.
Ensuring Stability
Your feeder needs to stay steady even on windy days or when birds land heavily. Think about the location where you’ll hang or place it—will it swing or tilt easily?
- If hanging, use a strong hook and secure string or wire that won’t fray quickly.
- For a standing feeder, add weight to the base or use a wider stand to prevent tipping.
- Consider attaching a small wind shield around the feeder to reduce movement.
Have you ever seen a feeder swinging wildly and wondered why birds avoid it? Stability matters because it gives hummingbirds confidence to feed without disturbance. Your feeder’s design can encourage more frequent visits simply by standing firm.

Credit: homeiswheretheboatis.net
Hanging And Placement Tips
Hanging and placing your homemade hummingbird feeder correctly helps attract more hummingbirds. The right spot offers easy access and safety for the birds. It also makes feeding times more enjoyable for you to watch. Careful placement can protect the feeder from weather damage and keep the nectar fresh longer.
Best Locations
Pick a quiet spot away from busy areas. Hummingbirds prefer places near flowers or shrubs. They feel safe close to natural cover but still want clear views. Hang the feeder where sunlight hits in the morning. This helps keep the nectar fresh and easier for birds to find.
- Near flowering plants that attract hummingbirds
- Shaded areas during hot afternoons
- Visible from windows for easy watching
- At least 3 to 5 feet above ground
Protecting From Predators
Keep the feeder out of reach from cats and squirrels. Use a baffle or place the feeder on a thin pole. Avoid hanging near places where birds can be ambushed. Regularly clean the feeder to prevent ants and other insects.
- Install squirrel baffles on poles
- Hang feeders 10 feet away from jumping spots
- Clear nearby branches that hide predators
- Use ant moats or barriers to stop ants
Cleaning And Maintenance
Keeping your homemade hummingbird feeder clean is essential for the health of the birds and the longevity of your feeder. Neglecting this simple task can lead to mold, bacteria, and even harm the little visitors you want to attract. Let’s look at the best ways to maintain your feeder so it stays safe and inviting.
How Often To Clean
You should clean your hummingbird feeder at least once a week. If the weather is hot or humid, increase cleaning to twice a week to prevent fermentation and mold growth. Empty any leftover nectar before refilling with fresh sugar water.
Pay attention to signs like cloudy nectar or dead insects inside the feeder. These are clear warnings that it’s time to clean. Have you ever noticed your feeder looking sticky or smelling sour? That’s a strong hint that cleaning can’t wait.
Preventing Mold And Bacteria
Mold and bacteria can grow quickly in sugary nectar. Use a mixture of warm water and white vinegar or mild dish soap to scrub every part of your feeder thoroughly. Avoid harsh chemicals that can harm birds.
- Use a small brush or pipe cleaner to reach tight spots.
- Rinse the feeder completely to remove any soap residue.
- Dry the feeder fully before refilling to stop mold growth.
One trick I learned is to soak the feeder parts in vinegar solution for 10-15 minutes before scrubbing. It loosens stubborn residue and kills germs effectively. How could you make cleaning easier with tools you already have at home?
Credit: www.instructables.com
Attracting Hummingbirds
Attracting hummingbirds to your homemade feeder brings life and color to your garden. These tiny birds are drawn by specific signals in nature. Understanding what appeals to them helps you create the perfect feeding spot. Patience and the right environment make all the difference in welcoming these lively visitors.
Using Colors And Flowers
Hummingbirds love bright colors, especially red and orange. These colors catch their attention quickly. Place your feeder near flowers with similar colors for a natural look. Native flowers like trumpet vine or bee balm work well. The scent and nectar of these flowers invite hummingbirds to stay longer.
Choose feeders with red parts or add red ribbons nearby. Avoid feeders with yellow, which can attract bees instead. Bright colors signal food and safety to hummingbirds. This simple trick helps them find your feeder easily.
Timing And Patience
Hummingbirds visit feeders more during early morning and late afternoon. These are their busiest feeding times. Keep your feeder clean and filled with fresh nectar. Change the nectar every few days to avoid mold.
Wait patiently after setting up your feeder. It may take days or weeks for hummingbirds to discover it. Watch quietly from a distance. Sudden movements can scare them away. Regular visits will soon become a joyful routine.
Frequently Asked Questions
How Do I Make Homemade Hummingbird Nectar?
To make hummingbird nectar, mix 1 part white sugar with 4 parts water. Boil the mixture, then cool it before filling the feeder. Avoid using honey or artificial sweeteners as they can harm birds.
What Materials Are Needed For A Diy Hummingbird Feeder?
You need a clean plastic bottle or glass jar, a red base or paint, small feeding ports, and a hanging mechanism. These materials are easy to find and safe for hummingbirds.
How Often Should I Clean My Homemade Hummingbird Feeder?
Clean your feeder every 3 to 4 days in warm, soapy water. Rinse thoroughly to prevent mold and bacteria growth, which can be harmful to hummingbirds.
Can I Use Homemade Feeders Year-round?
Yes, but only if hummingbirds are present in your area. In colder months, feeders may freeze and should be removed to avoid harming birds.
Conclusion
Creating a homemade hummingbird feeder is simple and rewarding. It invites vibrant birds to your garden. You just need a few materials. Plus, it’s budget-friendly and fun to make. Watching hummingbirds sip from your creation brings joy. Remember to clean the feeder often.
This keeps the birds healthy and coming back. Enjoy the beauty and sounds of nature right in your backyard. With a little effort, you create a haven for these delightful creatures. So, gather your supplies and start today. Your garden will thank you.