
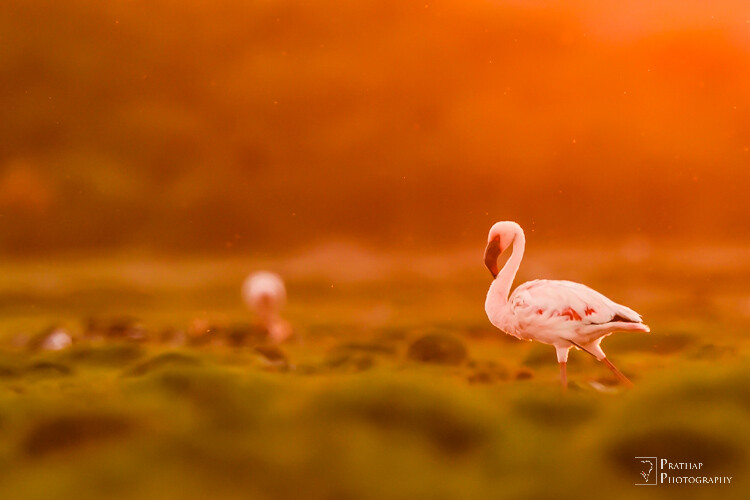
Capturing the beauty of birds in their natural habitat can be both exhilarating and challenging. If you’re wondering about the best settings for bird photography, you’re in the right place.
Whether you’re a seasoned photographer or a curious beginner, understanding the right settings can transform your photos from ordinary to extraordinary. Imagine the thrill of capturing the intricate details of a bird’s feathers or the dynamic energy of its flight.
The right camera settings can make all the difference. In this guide, you’ll discover the secrets to perfecting your bird photography skills. Ready to unlock the full potential of your camera and create stunning images? Let’s dive in and explore how you can capture the essence of these magnificent creatures with precision and flair.
Camera Settings
Getting your camera settings right is crucial for capturing stunning bird photos. Each setting plays a specific role in freezing motion, maintaining sharpness, and dealing with light conditions. Adjusting these settings thoughtfully helps you bring out the best in your shots, even when birds move unpredictably or light changes quickly.
Choosing The Right Shutter Speed
Birds rarely stay still. To freeze their fast wing beats or sudden movements, you need a fast shutter speed. A good starting point is 1/1000 second, but faster speeds like 1/2000 or 1/4000 second may be necessary for small, quick birds.
Try to balance shutter speed with light availability. If your images are too dark, consider boosting ISO or opening up your aperture instead of slowing down the shutter. Have you noticed how a crisp wing freeze changes the energy of your bird photos?
Optimal Aperture For Sharpness
Aperture controls depth of field and sharpness. For bird photography, an aperture between f/5.6 and f/8 usually works well. This range keeps most of the bird in focus while allowing enough light for faster shutter speeds.
Using very wide apertures (like f/2.8) can blur parts of the bird, especially if it’s facing you. Too narrow (like f/16) may introduce diffraction and reduce overall sharpness. What aperture settings have given you the sharpest bird portraits?
Iso Settings For Different Lighting
ISO determines your camera’s sensitivity to light. Bright daylight lets you keep ISO low (100-400), which reduces noise and keeps details clear. In shade or overcast conditions, bumping ISO up to 800 or 1600 helps maintain fast shutter speeds without dark images.
Don’t be afraid to push ISO higher if your camera handles noise well. It’s better to have a slightly grainy but sharp image than a blurry one. How far do you usually push ISO before the noise bothers you?
Using Continuous Autofocus
Birds move quickly and unpredictably. Continuous autofocus (AI Servo or AF-C mode) tracks your subject as it moves, keeping it sharp in the frame. This setting is essential when photographing flying birds or those hopping between branches.
Pair continuous autofocus with a good focus point selection—usually the center or a cluster near the bird’s eye. This approach improves your chances of sharp shots during fast action. Have you tested how different autofocus modes affect your success rate in bird photography?

Credit: digital-photography-school.com
Lens Selection
Choosing the right lens is key to great bird photography. The lens affects image quality, reach, and ease of use. Bird photographers often need to capture small subjects from a distance. This means lens choice can make or break your shots.
Telephoto Lenses Benefits
Telephoto lenses allow you to zoom in on birds without getting too close. This avoids scaring them away. They offer a long focal length, usually 300mm or more. This helps capture fine details like feathers and eyes. Telephoto lenses also create a blurred background, making the bird stand out.
These lenses work well in open spaces or when birds perch far away. They let you keep distance while filling the frame with your subject. Many bird photographers prefer telephoto lenses for their reach and sharpness.
Prime Vs Zoom Lenses
Prime lenses have a fixed focal length. They often deliver sharper images and wider apertures. A wide aperture lets in more light and creates a nice background blur. Primes are lighter and simpler to carry, which helps during long shoots.
Zoom lenses cover a range of focal lengths. They offer flexibility to adjust framing quickly. Zooms reduce the need to change lenses in the field. This saves time and keeps your gear safe from dust or moisture.
Choosing between prime and zoom depends on your style. Primes suit controlled environments or specific subjects. Zooms fit dynamic scenes with varying bird distances.
Lens Stabilization Features
Lens stabilization reduces blur caused by hand movements. It is especially helpful when using long lenses. Stabilization lets you shoot at slower shutter speeds without losing sharpness. This is useful in low light or when birds stay still for a moment.
There are two main types: optical image stabilization (OIS) and vibration reduction (VR). Both work inside the lens to steady the image. Using a stabilized lens improves your chances of crisp bird photos. It also reduces fatigue by easing the need for very fast shutter speeds.
Lighting And Exposure
Lighting and exposure are crucial in bird photography because they directly affect the clarity and mood of your shots. The right lighting reveals the vibrant colors and intricate details of birds, while proper exposure ensures your images aren’t too dark or washed out. Understanding how to work with different lighting conditions will elevate your bird photos significantly.
Shooting In Natural Light
Natural light is your best friend when photographing birds. Early morning and late afternoon provide soft, warm light that enhances feathers without harsh shadows. Try to position yourself so the sun illuminates your subject from the side or behind you to capture rich colors and sharp details.
Overcast days can also be a blessing. The diffused light reduces contrast and helps you avoid blown-out highlights. Have you noticed how bird colors pop more under soft clouds? That’s the kind of lighting that brings out natural beauty effortlessly.
Dealing With Harsh Sunlight
Harsh sunlight can create strong shadows and overexposed spots on your bird subject. Shooting midday often results in these challenges, but you can still get great shots by adjusting your approach.
Try to find shaded areas where the light is softer, or wait for the bird to move into the shade. If that’s not possible, use a faster shutter speed and a smaller aperture to control exposure. Have you ever tried underexposing slightly to keep the bird’s details intact? It can prevent blown highlights and keep colors vibrant.
Using Exposure Compensation
Exposure compensation is a powerful tool to fine-tune your images on the spot. If your camera’s meter tends to overexpose a bright bird against a dark background, dial in negative exposure compensation to darken the shot.
On the other hand, if your bird is too dark in a bright setting, increase the exposure compensation to brighten it up. Don’t be afraid to experiment—small adjustments can make a big difference. What exposure setting have you found works best for tricky lighting situations?

Credit: digital-photography-school.com
Focus Techniques
Focus techniques play a crucial role in capturing sharp and stunning bird photographs. Birds move quickly and unpredictably, so your focus method can make or break the shot. Understanding how to use your camera’s focus settings effectively will help you freeze motion and emphasize the beauty of your subject.
Single Point Vs Dynamic Area
Single point focus lets you choose one exact spot to lock onto your bird. This works well for still birds or when you want precise control over which part of the bird is sharp. I find it especially useful when shooting perched birds, allowing me to highlight the eye or head.
Dynamic area focus, on the other hand, tracks the subject within a group of focus points. It’s ideal for birds in flight or quick movements because the camera adjusts focus as the bird moves. Try dynamic area when the bird is flying erratically or weaving through branches—it keeps your subject sharp without needing to constantly reposition the focus point.
Tracking Moving Birds
Tracking moving birds requires a focus mode that can follow fast changes in position. Continuous autofocus (AF-C or AI Servo) is designed for this purpose. It constantly adjusts focus as the bird flies, helping you maintain clarity even during rapid flight.
Practice tracking by panning with the bird smoothly and keeping your shutter button half-pressed to lock focus. This technique improves your hit rate and gives you a better chance at crisp flight shots. What challenges do you face when trying to track birds in your local park?
Manual Focus Tips
Manual focus might seem old school, but it can be lifesaving when autofocus struggles. For example, shooting through dense foliage or low contrast scenes can confuse autofocus systems.
Use manual focus by zooming in on your LCD or viewfinder to fine-tune sharpness. Focus peaking, if available, highlights the areas in focus and makes manual adjustments easier. Try setting your lens to manual focus in tricky lighting or when you want full control over your shot’s sharpness.
Camera Modes
Choosing the right camera mode is crucial for capturing stunning bird photos. Each mode offers a unique set of tools that can help you adapt to different lighting conditions and bird behaviors. Understanding how these modes work can elevate your photography from average snapshots to compelling wildlife stories.
Benefits Of Aperture Priority
Aperture Priority lets you control the depth of field while the camera sets the shutter speed. This is especially useful when you want the bird sharp and the background nicely blurred to make your subject pop.
Using a wide aperture (small f-number) isolates the bird from distracting backgrounds. I remember shooting a hummingbird where the blurred background made the tiny details on its feathers stand out beautifully.
It’s a great mode if you want to focus on composition and let your camera handle exposure. Just keep an eye on shutter speed to avoid motion blur with fast-moving birds.
Using Shutter Priority
Shutter Priority puts you in charge of freezing or showing motion by selecting the shutter speed. When birds are in flight or flapping rapidly, a fast shutter speed (like 1/1000s or faster) is essential.
On the other hand, slowing down shutter speed can create artistic motion blur effects on wings. Have you tried capturing a bird taking off? Adjusting shutter speed lets you experiment with these dynamic shots.
This mode frees you from worrying about aperture but watch your ISO to keep images noise-free in lower light.
Manual Mode For Control
Manual Mode hands you full control over aperture, shutter speed, and ISO. It’s perfect when lighting conditions are tricky or changing fast.
When I photographed a bird against a bright sky, manual settings helped me avoid overexposure and maintain detail in the feathers. It requires practice but gives you the flexibility to nail the shot exactly how you envision it.
Start by balancing aperture and shutter speed, then adjust ISO for the right brightness. Manual mode is your best friend once you understand your camera’s exposure triangle.
Composition Tips
Good composition makes bird photos more interesting and clear. It guides the viewer’s eyes to the bird, making the image feel balanced and natural. Simple tips can improve your shots and show birds in their best way.
Rule Of Thirds In Bird Shots
Place the bird off-center for a pleasing photo. Divide the frame into a 3×3 grid. Put the bird near one of the four points where the lines cross. This creates space for the bird to look or move into. The image feels balanced and natural this way.
Capturing Bird Behavior
Show what the bird is doing. Birds eating, flying, or singing tell a story. Wait and watch for interesting actions. Capture these moments to make your photo alive. This adds emotion and makes the viewer connect with the bird.
Background And Foreground Choices
Choose simple backgrounds to highlight the bird. Avoid clutter or bright colors that distract. Use soft, blurred backgrounds to make the bird stand out. Include natural elements like branches or leaves in the foreground for depth. This makes the photo feel three-dimensional and rich.
Shooting Techniques
Shooting techniques play a vital role in bird photography. They help capture sharp, well-timed, and beautiful images. Proper techniques improve the chances of catching birds in action. Understanding these techniques ensures better control over your camera and settings. It also helps in adjusting to fast movements and changing light conditions.
Burst Mode Advantages
Burst mode lets the camera take many photos in quick succession. This is useful for fast-moving birds. It increases the chance of capturing the perfect moment. You can select the best image from a series of shots. Burst mode also helps with action shots like flying or feeding birds. It reduces the risk of missing important details.
Using Tripods And Monopods
Tripods and monopods provide stability for your camera. They reduce camera shake, especially with long lenses. This results in sharper images. Tripods are best for stationary shots or long waits. Monopods offer more mobility while still giving support. Both tools help maintain focus and framing during long sessions.
Patience And Timing
Patience is key in bird photography. Birds move quickly and unpredictably. Waiting quietly improves the chance of getting close shots. Observing bird behavior helps predict their movements. Timing your shots at dawn or dusk can produce softer light. Good timing captures birds in natural and beautiful poses.

Credit: digital-photography-school.com
Post-processing
Post-processing is an essential part of bird photography. It helps improve photos after taking them. Adjustments can bring out hidden details and make colors more vivid. Editing allows better focus on the bird, removing distractions. This stage turns a good shot into a great one.
Enhancing Details And Colors
Use editing tools to sharpen feathers and eyes. Increase contrast slightly for more depth. Boost colors gently to keep a natural look. Avoid over-editing, which makes photos look fake. Adjust brightness and shadows to highlight the bird’s shape.
Cropping For Impact
Crop to remove unnecessary parts of the image. Focus on the bird and its key features. Use the rule of thirds for better composition. Cropping can change the photo’s story and draw attention. Make sure the bird remains the main subject.
Noise Reduction Methods
Bird photos taken in low light may have noise. Use noise reduction tools carefully to keep details sharp. Balance is important; too much smoothing loses texture. Apply noise reduction mainly on backgrounds and shadows. This keeps the bird clear and the image clean.
Frequently Asked Questions
What Camera Settings Work Best For Bird Photography?
Use a fast shutter speed of 1/1000s or higher to freeze motion. Set aperture around f/5. 6 for sharpness and background blur. Use ISO 400-800 for balanced exposure in natural light. Shoot in continuous autofocus mode for sharp images of moving birds.
How To Choose The Right Lens For Bird Photography?
A telephoto lens with 300mm or longer focal length is ideal. It lets you capture detailed shots from a distance. Choose lenses with image stabilization to reduce blur. Prime lenses offer better sharpness but less flexibility than zoom lenses.
Should I Shoot Birds In Raw Or Jpeg Format?
Shooting in RAW preserves maximum image data and dynamic range. It allows better post-processing flexibility for exposure and color correction. JPEG files are smaller but lose detail and editing potential. For bird photography, RAW is recommended for best quality.
What Is The Best Iso Setting For Bird Photography?
Use the lowest ISO possible for clear, noise-free images. Start with ISO 400 in good light and increase as needed. Higher ISO helps maintain fast shutter speeds in low light but may add noise. Modern cameras handle ISO 800-1600 well for bird shots.
Conclusion
Choosing the right settings makes bird photography more enjoyable. Use a fast shutter speed to catch movement clearly. Set a wide aperture for a soft background. Adjust ISO to keep images bright without noise. Practice often to learn what works best outside.
Watch birds patiently and be ready to shoot. Every photo helps you improve your skills. Keep your camera settings simple and flexible. This way, you capture beautiful, sharp bird pictures every time. Happy shooting!