

Imagine capturing the elegant flutter of wings mid-flight or the vibrant hues of a parrot against a lush, green backdrop. Bird photography offers a unique thrill and a rewarding challenge.
It’s about more than just snapping pictures—it’s about freezing a moment in time, a moment you can share with the world. Are you ready to elevate your photography skills and explore nature’s beauty from a fresh perspective? By the end of this article, you’ll discover how to sharpen your focus, choose the right equipment, and develop the patience required to capture stunning avian images.
Whether you’re an aspiring photographer or a seasoned pro, a bird’s eye view of bird photography will open your eyes to new possibilities and techniques. Get ready to transform your passion for nature into breathtaking photos that tell a story.
Essential Gear For Bird Photography
Bird photography requires more than just passion. The right gear helps capture clear, sharp images of birds in action. Quality equipment improves photo results and makes shooting easier. Understanding essential tools sets a solid foundation for every bird photographer.
Choosing The Right Camera
A camera must handle fast movements and varied light conditions well. DSLRs and mirrorless cameras suit bird photography best. Look for cameras with fast autofocus and high frame rates. Cameras with good ISO performance help in low light. Consider a camera with weather sealing for outdoor shoots.
Best Lenses For Capturing Birds
Long lenses allow close-up shots without disturbing birds. Telephoto lenses from 300mm to 600mm work well. Prime lenses offer sharp images but less flexibility. Zoom lenses give versatility to frame birds at different distances. Look for lenses with image stabilization to reduce blur.
Tripods And Stabilization Tools
Stable support is crucial for sharp photos. Tripods reduce camera shake during long shoots. Choose lightweight and sturdy tripods for easy transport. Gimbals and monopods add flexibility and quick movement. Use bean bags or clamps for extra stability in tricky spots.

Credit: www.shutterstock.com
Mastering Bird Behavior
Understanding bird behavior is key to capturing stunning photographs. When you know how birds act, you can predict their moves and be ready with your camera. This knowledge turns random shots into meaningful stories.
Identifying Common Bird Species
Start by learning the birds you see most often. Notice their size, colors, and unique markings. Keep a small notebook or use a bird ID app to jot down details.
Knowing species helps you anticipate their habits. For example, woodpeckers drum on trees, while swallows swoop fast in open skies. Recognizing these patterns improves your timing and framing.
Timing Your Shots With Bird Activity
Birds don’t act the same all day. Early mornings and late afternoons are usually the best times to catch them active and lit by soft light. Plan your outings around these hours.
Observe when birds feed, rest, or fly. You might notice robins hunting worms right after rain or sparrows gathering at feeders mid-morning. Matching your shoot to their routine increases your chances of great photos.
Reading Bird Movements
Birds communicate a lot through their movements. Watch for quick head turns or tail flicks—these signs can tell you if a bird feels safe or is about to fly. Reacting to these cues can save your shot.
When a bird suddenly shifts position or looks around, it might be spotting a predator or a mate. Being alert to these subtle hints helps you capture natural, expressive moments instead of startled birds.
Composing Stunning Bird Photos
Composing stunning bird photos is more than just pointing your camera and clicking. It’s about carefully arranging elements within the frame to tell a story or capture a moment that feels alive. How you frame your subject, use light, and choose the background can turn an ordinary shot into an extraordinary one.
Framing And Angles
Think about how you position the bird in your frame. Placing it off-center often creates more visual interest than a centered subject. Try different angles—shooting from below can give a majestic feel, while eye-level shots connect you directly with the bird’s world.
Don’t hesitate to get close or zoom in to capture fine details like feathers or expressions. Sometimes, a tighter crop highlights the bird’s personality better than a wide landscape.
Using Natural Light Effectively
Natural light can make or break your bird photos. Early morning or late afternoon light adds warmth and soft shadows, enhancing textures and colors. Midday sun, however, can create harsh contrasts and washed-out colors, so look for shaded areas or wait for clouds to diffuse the light.
Have you noticed how backlighting can create stunning silhouettes or highlight feathers in a magical way? Experiment with the direction of light to see how it changes the mood of your images.
Backgrounds And Settings
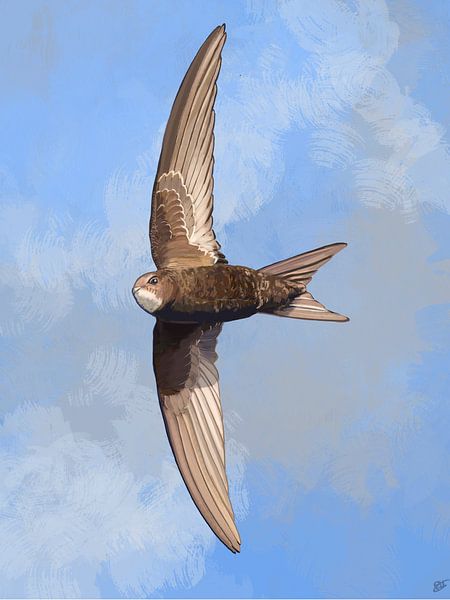
Backgrounds should complement, not distract from, your bird. A cluttered or bright background can steal attention away from your subject. Look for simple, natural settings like blurred foliage, open skies, or soft water reflections.
Using a wide aperture to blur the background helps your bird stand out sharply. Think about the story your background tells—does it show the bird’s habitat or add to the mood? Your choice here can add depth and context to the photo.
Credit: www.artheroes.com
Techniques For Sharp And Clear Images
Capturing sharp and clear bird photos requires specific techniques. Birds move fast and often in unpredictable ways. Using the right camera settings helps freeze action and keep images crisp. Understanding focus, shutter speed, and ISO is essential. Managing motion blur also improves image quality. Here are key tips to enhance your bird photography.
Focus Modes And Settings
Select autofocus modes designed for moving subjects. Continuous autofocus (AF-C) tracks birds in flight or hopping. Use single-point focus to lock on the bird’s eye or head. Avoid multi-point focus that might target the background. Manual focus works well for perched birds or still subjects. Use focus tracking if your camera supports it. Keep your lens clean to avoid soft images.
Shutter Speed And Iso Tips
Fast shutter speeds freeze bird movement. Aim for 1/1000 second or faster for flying birds. Use 1/500 second for perched or slow-moving birds. Adjust ISO to maintain proper exposure. Higher ISO helps in low light but may add noise. Find a balance between shutter speed and ISO for clear photos. Use your camera’s ISO auto mode with limits to avoid grainy images.
Handling Motion Blur
Motion blur can ruin sharpness in bird photos. Use faster shutter speeds to reduce blur. Stabilize your camera with a tripod or monopod. Use image stabilization features in your lens or camera. Anticipate bird movement and follow smoothly with your camera. Avoid camera shake by pressing the shutter gently. Practice panning to capture flying birds sharply while showing background blur.
Ethical Practices In Bird Photography
Ethical practices in bird photography are essential to protect both the birds and their natural environments. As photographers, your responsibility goes beyond capturing stunning images—it includes ensuring your actions do not harm the wildlife you admire. By adopting respectful and mindful habits, you help preserve these creatures and their habitats for future generations.
Respecting Wildlife And Habitat
Respect starts with understanding the birds’ needs and behaviors. Avoid getting too close or disrupting their routines, especially during nesting or feeding times. I once watched a photographer scare a family of ducks by getting too close for a shot—it’s a clear reminder that your presence can have unintended consequences.
Focus on using long lenses to maintain distance. Stay on marked trails to avoid trampling delicate plants or disturbing nests. Your goal should be to blend into the environment, not change it.
Avoiding Disturbance
Birds are sensitive to noise and sudden movements. Use silent shooting modes and move slowly to minimize stress. I remember waiting quietly for over an hour near a bird feeder, and the patience paid off with natural, relaxed shots—something that wouldn’t have happened if I rushed or made noise.
Limit the time you spend near any one spot. If a bird shows signs of distress, such as alarm calls or flight, back away immediately. Your photos aren’t worth causing harm or fear.
Legal Considerations
Many regions have strict laws protecting birds and their habitats. Research local regulations before you head out. Some species may be protected year-round, while others only during breeding seasons.
Permits might be required for access to certain reserves or to use specialized equipment. Ignoring these rules can lead to fines or worse, harm to the birds. Staying informed helps you avoid legal trouble and supports conservation efforts.

Credit: www.reuters.com
Post-processing Tips
Post-processing is where your bird photography truly comes to life. It’s the chance to highlight the beauty you captured and fix small issues that might distract from the main subject. Let’s look at some practical tips that make your bird images pop without overdoing it.
Enhancing Colors And Details
Adjusting colors can bring out the natural vibrancy of the bird’s feathers and the surrounding environment. Use tools like vibrance and saturation carefully—too much can make the image look fake. Sharpening the details helps emphasize the texture of feathers, but don’t go overboard; subtlety keeps the image realistic.
Have you noticed how a slight boost in clarity can reveal the intricate patterns on a bird’s wing? Try adjusting the contrast to add depth, especially when the lighting in the original photo was flat. These small tweaks can make your photos stand out in a crowded gallery.
Cropping For Impact
How you crop your image can change its entire story. Tighten the frame to focus more on the bird’s expression or action, removing unnecessary space that doesn’t add value. Sometimes, a wider crop works better if the background enhances the scene, like a bird in flight with clouds behind.
Consider the rule of thirds to place your bird in a dynamic position rather than dead center. This technique draws the viewer’s eye naturally and creates balance. Don’t hesitate to experiment with different crops—what looks good on one screen might differ on another.
Removing Distractions
Distractions like stray branches, spots, or sensor dust can pull attention away from your subject. Use cloning or healing tools to clean these up without altering the natural setting. I once spent more time removing a tiny twig crossing a bird’s beak than on the entire shoot, and it made a huge difference in the final image’s impact.
Ask yourself: does that bright spot or background element add to the story or just clutter the frame? Removing distractions helps viewers connect directly with the bird, making your photography more compelling. Keep your edits subtle so the image feels authentic and untouched.
Inspiring Locations For Bird Photography
Bird photography flourishes in places rich with wildlife and natural beauty. Choosing the right location can transform simple photos into stunning bird portraits. Nature reserves, coastal areas, and even cities offer unique opportunities to capture birds in their element. Diverse habitats mean diverse bird species and behaviors.
Exploring varied spots helps photographers see different bird types and actions. Each location provides a new setting for creativity and skill development. Patience and observation turn these places into living classrooms for bird lovers and photographers.
Top Birdwatching Destinations
- Everglades National Park, USA – Home to herons, egrets, and raptors.
- Kruger National Park, South Africa – Spot vibrant starlings and kingfishers.
- Danum Valley, Borneo – Famous for hornbills and rare forest birds.
- Camargue, France – Known for flamingos and migratory waterfowl.
- Galápagos Islands, Ecuador – Unique species found nowhere else.
Seasonal Hotspots
- Arctic Tundra – Ideal for photographing migratory shorebirds in summer.
- Monsoon Forests in India – Best for colorful birds during rainy season.
- Central America – Great for spotting hummingbirds during migration.
- Australian Wetlands – Attract waterbirds in dry seasons.
- European Woodlands – Showcases songbirds in spring and autumn.
Urban Bird Photography Spots
- City Parks – Common place for pigeons, sparrows, and ducks.
- Riversides and Lakes – Attract herons, gulls, and kingfishers.
- Urban Gardens – Good for photographing finches and warblers.
- Skyscraper Rooftops – Sometimes host falcons and swifts.
- Botanical Gardens – Offer diverse bird species and flowers.
Frequently Asked Questions
What Equipment Is Best For Bird Photography?
A DSLR or mirrorless camera with a telephoto lens is ideal. Use a tripod for stability. A fast shutter speed helps capture sharp images of moving birds.
How To Find The Best Locations For Bird Photography?
Research local bird sanctuaries, parks, and wetlands. Early mornings or late afternoons offer better lighting and active birds. Use birdwatching apps to track species and hotspots.
What Settings Improve Bird Photography Results?
Use a fast shutter speed (1/1000s or faster) to freeze motion. Set a wide aperture for a blurred background. Increase ISO only when lighting is low to avoid noise.
How To Approach Birds Without Scaring Them Away?
Move slowly and wear neutral colors. Use a telephoto lens to keep distance. Avoid sudden movements and loud noises. Patience and camouflage increase your chances of close shots.
Conclusion
Bird photography lets you see nature’s beauty up close. Patience and practice bring better shots every time. Use simple tools and enjoy the quiet moments outdoors. Birds offer endless chances to capture unique images. Keep learning and exploring different places to find birds.
This hobby connects you with nature and sharpens your skills. Each photo tells a small story of the wild. Try often, and watch your bird photos improve steadily.