
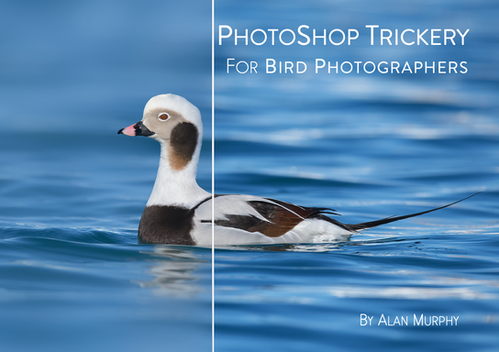
Imagine capturing a stunning photograph of a bird, but the background is too busy, detracting from the beauty of the subject. What if you could transform that busy background into a soft blur, making the bird stand out like never before?
You might think that achieving this effect requires years of experience or professional tools, but the truth is, you can do it yourself using Photoshop. This guide will show you exactly how to blur the background in your bird photography, allowing you to highlight every vibrant feather and delicate detail.
Don’t let a cluttered background steal the spotlight from your bird photos. Dive into this article, and discover how to elevate your bird photography to a professional level with just a few clicks. Your next masterpiece is just a blur away!

Credit: www.thebirdinglife.com
Choosing The Right Photo
Choosing the right photo is crucial for effective background blurring in bird photography. The photo you select sets the foundation for editing success. Focus on images where the bird stands out clearly. A good starting photo makes the Photoshop process smoother and more natural.
Selecting Sharp Bird Images
Sharpness matters most in bird photography. Select photos where the bird is in clear focus. Blurry or soft images reduce the impact of background blur. A sharp bird maintains details and draws attention. Check for clear edges around feathers and eyes.
Identifying Distracting Backgrounds
Not all backgrounds benefit from blurring. Pick photos with busy or cluttered backgrounds. Elements like branches, leaves, or bright spots distract from the bird. A distracting background makes the blur effect more useful. Simple or uniform backgrounds may not need much editing.
Preparing The Image In Photoshop
Preparing your bird photograph in Photoshop sets the stage for a smooth editing process. This phase helps keep the original image safe and makes the background blur effect easier to apply. Start by organizing your layers and making the background editable. These steps build a strong base for your editing work.
Opening And Duplicating Layers
Begin by opening your bird photo in Photoshop. Use the File > Openmenu to select your image. After opening, duplicate the background layer. This keeps your original photo intact.
- Right-click the background layer in the Layers panel.
- Select Duplicate Layer.
- Name the new layer to stay organized.
Working on the duplicated layer lets you edit without changing the original. This step is essential for non-destructive editing.
Unlocking The Background Layer
Photoshop locks the background layer by default. Unlock it to make edits easier. Click the lock icon next to the background layer in the Layers panel. This action frees the layer for adjustments.
Once unlocked, you can move, mask, or apply filters to this layer. This control helps when you want to blend the blurred background smoothly.
Isolating The Bird
Isolating the bird from the background is a crucial step in blurring the background effectively. It helps you keep the bird sharp and detailed while softly blending the surroundings. Let’s look at how you can isolate your feathered subject using Photoshop tools that are both powerful and user-friendly.
Using Quick Selection Tool
The Quick Selection Tool is a great starting point for isolating your bird. It works by detecting edges and areas of similar color, allowing you to paint over the bird quickly.
Simply select the tool, then click and drag over the bird. If you accidentally select part of the background, hold down the Alt key (Option on Mac) and brush over the unwanted area to subtract it.
Think about the bird’s contours—do they have intricate feathers or smooth edges? This tool can get you most of the way there, but you’ll likely need to refine the selection for the best results.
Refining Edges For Accuracy
Photoshop’s Refine Edge or Select and Mask feature helps you clean up the selection around delicate parts like feathers. This step is where you make the selection look natural and precise.
Use the Refine Edge Brush to paint over tricky areas. It detects fine details and softens the edge, preserving feather texture instead of creating a harsh outline.
Adjust sliders like Smooth, Feather, and Contrast to balance sharpness and softness. Have you noticed how a slightly softened edge enhances realism? That’s what this step achieves.
Creating A Layer Mask
Once your selection is perfect, creating a layer mask allows you to isolate the bird non-destructively. The mask hides everything outside your selection without deleting pixels.
Click the “Add Layer Mask” button at the bottom of the Layers panel. Now, your bird is separated on the same layer, ready for background blur without affecting the subject.
If you spot areas that need tweaking later, simply paint on the mask with black or white to hide or reveal parts of the bird. This flexibility is invaluable for fine-tuning your image.

Credit: digital-photography-school.com
Blurring The Background
Blurring the background in bird photography helps your subject stand out sharply against a soft, dreamy backdrop. It draws the viewer’s eyes directly to the bird, removing distractions and adding depth to your image. Photoshop offers several tools to achieve this effect with precision and creativity.
Applying Gaussian Blur
Gaussian Blur is a straightforward way to smooth out the background. After selecting the bird using tools like the Quick Selection or Pen Tool, you can invert the selection to isolate the background.
Then, head to Filter > Blur > Gaussian Blurand slide the radius to increase or decrease the blur strength. Don’t go too far—too much blur can make the image look unnatural.
Try subtle changes and compare before and after. How does the bird’s sharpness contrast with the softened background? This technique is perfect if you want a simple yet effective blur.
Adjusting Blur Intensity
Finding the right blur intensity is crucial. Too little blur might not create enough separation, while too much can make your photo look fake.
Zoom in on your image and adjust the blur in increments. Notice how the edges of the bird interact with the background—does the blur enhance the focus or distract?
Use the Layer Maskto refine areas where the blur might spill over onto the bird or important details. This control ensures your subject remains crisp and your background smoothly blurred.
Using Lens Blur For Realism
Gaussian Blur can sometimes produce a flat effect. Lens Blur mimics the natural bokeh created by camera lenses, adding depth and realism.
After selecting the background, apply Filter > Blur > Lens Blur. Adjust settings like radius and blade curvature to simulate aperture effects.
Lens Blur also supports depth maps, so if you want to get advanced, create a depth map to control blur variation across the background. This technique can make your bird photo look like it was captured with a high-end camera lens.
Enhancing The Final Image
Enhancing the final image in bird photography brings focus and depth to your photo. It helps the bird stand out beautifully against a smooth, blurred background. Small adjustments can make a big difference in the overall look. These tweaks improve the sharpness, color, and mood of the image.
Fine-tuning Mask Edges
Refining the edges of your mask ensures a natural blend between the bird and background. Use the “Refine Edge” or “Select and Mask” tool in Photoshop. Smooth out rough edges and reduce halos around feathers. Zoom in closely to spot any mistakes. Feather the mask slightly to soften the transition. This step avoids a cut-out or fake look.
Adjusting Colors And Contrast
Adjust colors to make the bird pop. Use adjustment layers like “Brightness/Contrast” or “Hue/Saturation.” Increase contrast to add depth and detail to feathers. Slightly boost saturation for vivid colors. Be careful not to overdo it. Balance the background tones to keep the focus on the bird. These changes create a lively and balanced image.
Adding Subtle Vignettes
A gentle vignette draws attention toward the center. Use the “Lens Correction” filter or create a new layer with a soft black brush. Lower the opacity so the vignette is subtle and natural. Avoid heavy darkening that distracts from the subject. This technique adds a professional touch and enhances the photo’s mood.
Saving And Exporting
After blurring the background in your bird photograph, saving and exporting the image correctly is crucial. This step ensures your work looks great on screens and in prints. Choosing the right file format and maintaining high image quality preserves the details of both the bird and the soft background blur.
Choosing File Formats
Select a file format based on how you will use the image. For online sharing, JPEG is common. It compresses the file size but may reduce some detail. Use PNG if you want lossless quality with transparency support. TIFF works best for printing or archiving, as it keeps all image data intact. PSD format saves your Photoshop layers, allowing future edits without losing quality.
Maintaining Image Quality
Keep image quality high during export. Set the resolution to at least 300 dpi for printing. For web use, 72 dpi is enough but avoid over-compressing. Use Photoshop’s “Save for Web” option to balance quality and file size. Always preview the final image to check sharpness and colors. Saving a backup in PSD format helps keep your editing safe for later changes.

Credit: digital-photography-school.com
Frequently Asked Questions
How Do I Blur Background In Photoshop For Birds?
Use the Select Subject tool to isolate the bird. Then, apply Gaussian Blur to the background layer. This technique keeps the bird sharp while softening the background, enhancing focus and depth.
What Photoshop Tools Best Blur Bird Photo Backgrounds?
The Gaussian Blur filter and Select Subject tool are ideal. First, select the bird, invert selection, then apply Gaussian Blur on the background for a professional look.
Can I Blur Background Without Affecting Bird Edges?
Yes, use layer masks after selection. This lets you refine edges and protect the bird from blur, ensuring a clean, natural separation between subject and background.
Why Blur Background In Bird Photography?
Blurring the background draws attention to the bird. It reduces distractions and creates a pleasing depth effect, enhancing the photo’s overall visual impact.
Conclusion
Blurring the background in bird photos helps your subject stand out clearly. Photoshop offers easy tools to create smooth, natural blur effects. Practice selecting and masking the bird carefully for best results. Keep your edits subtle to avoid unnatural looks.
This technique improves photo focus and adds a professional touch. Try these steps to enhance your bird photography today. With patience, your images will look sharper and more beautiful.