
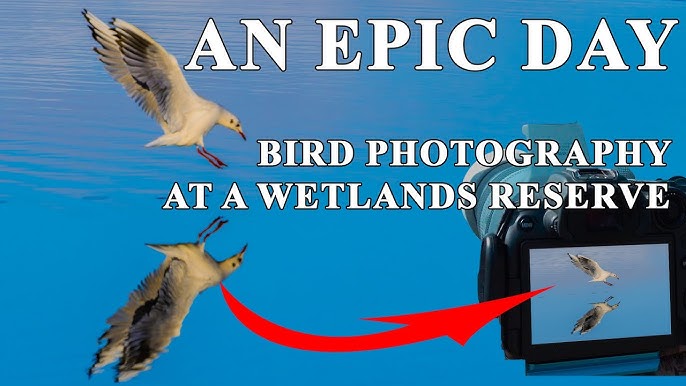
Capturing the grace and beauty of birds in flight can be both thrilling and challenging. If you’re eager to elevate your wildlife photography skills, you’ve landed in the right place.
In this guide, you’ll discover practical tips and techniques to perfectly photograph these majestic creatures as they soar through the sky. Imagine the satisfaction of capturing that perfect shot, where every feather is in focus and every movement is fluid.
With the right approach, you can transform your bird photography and create images that captivate. So, are you ready to uncover the secrets of photographing birds in flight? Let’s dive in and enhance your skills, one tip at a time.
Gear For Bird Photography
Capturing birds in flight demands the right gear. Choosing suitable equipment helps you get sharp, clear images. Your camera, lens, and accessories all play a big role. Each piece of gear supports different aspects of bird photography.
Choosing The Right Camera
Fast autofocus is key for bird photography. Cameras with high frame rates capture many shots quickly. Look for models with good sensor quality for sharp details. Weather sealing protects the camera during outdoor shoots. Mirrorless cameras often offer better autofocus and faster shooting speeds. DSLR cameras have a wide range of lens options. Choose a camera you feel comfortable handling for long periods.
Best Lenses For Flight Shots
Telephoto lenses are a must for bird photography. They let you shoot from a distance without disturbing birds. Lenses with focal lengths between 300mm and 600mm work best. Fast lenses with wide apertures like f/4 or f/5.6 help in low light. Image stabilization reduces blur from hand movements. Prime lenses often provide better sharpness. Zoom lenses offer flexibility to adjust framing quickly.
Essential Accessories
- Tripods or monopods stabilize your camera for clearer shots.
- Extra batteries keep you shooting longer without interruptions.
- Memory cards with fast write speeds handle continuous shooting.
- Camera straps or harnesses reduce fatigue during long sessions.
- Lens hoods prevent glare and improve image contrast.
- Rain covers protect your gear from unexpected weather.

Credit: www.youtube.com
Camera Settings For Action
Capturing birds in flight demands precise camera settings. Fast movement requires quick reactions from your camera. Adjusting your settings correctly helps freeze motion and keep birds sharp. The balance between shutter speed, aperture, and ISO is crucial. Autofocus must track the bird smoothly through the frame. Understanding these elements improves your chances of stunning shots.
Shutter Speed Tips
Use a fast shutter speed to freeze motion. Start with 1/1000 second or faster. Faster speeds prevent blur from wing movement. Adjust speed based on bird size and speed. Small birds need faster speeds than larger ones. A faster shutter speed may reduce light, so adjust ISO or aperture.
Aperture And Iso Settings
Choose a wider aperture to let in more light. Aperture values like f/4 or f/5.6 work well. A wide aperture also helps blur the background. Raise ISO to maintain fast shutter speeds in low light. Use ISO 400 to 1600, depending on light conditions. Avoid very high ISO to reduce noise in images.
Using Continuous Autofocus
Set your camera to continuous autofocus mode. This mode tracks moving birds automatically. It adjusts focus as the bird changes position. Use focus points that cover a wide area. This helps keep the bird sharp even when it moves quickly. Practice maintaining focus on the bird throughout flight.
Techniques To Capture Flight
Capturing birds in flight requires skill and patience. The right techniques help freeze motion and keep birds sharp. Using proper camera settings and steady movements improves your shots. Practice these techniques to get clear and dynamic flight photos.
Tracking Moving Birds
Follow the bird smoothly with your camera as it flies. Keep the bird centered in your viewfinder. Use continuous autofocus to maintain sharp focus. Move your whole body, not just your arms, for steady tracking. Practice on slower birds first to build confidence.
Panning For Motion Blur
Move your camera at the same speed as the bird. Use a slower shutter speed to create blur behind the bird. This shows movement and speed in your photo. Keep the bird sharp by following its flight path steadily. Try shutter speeds between 1/30 and 1/125 seconds for good results.
Anticipating Bird Behavior
Watch the bird’s actions before it takes off or changes direction. Learn common flight patterns for different species. Position yourself where the bird will fly next. Patience helps capture moments like wing flaps and turns. Understanding behavior leads to better timing and sharper images.
Lighting And Composition
Lighting and composition are key to capturing striking images of birds in flight. They guide the viewer’s eye and highlight the beauty and motion of your subject. Getting these right can turn an ordinary snapshot into a captivating story of wildlife in action.
Shooting In Natural Light
Natural light brings out the true colors and details of birds. Early mornings and late afternoons offer soft, warm light that enhances feathers and creates appealing shadows. Harsh midday sun can cause unwanted glare or deep shadows, so try to position yourself with the sun behind you.
Cloudy days can actually be great for shooting because the light is diffused evenly. Have you noticed how a soft sky can reduce harsh contrasts and reveal more subtle details?
Framing Dynamic Shots
Composition is about more than just centering your bird. Leave space in the direction the bird is flying to give a sense of motion and freedom. This “leading space” helps viewers feel like they’re following the flight path.
Try different angles: shooting slightly from below can make the bird appear majestic, while a side view often captures wing movement best. Don’t hesitate to experiment with tight close-ups or wider shots that include the environment.
Background And Contrast
A busy or bright background can distract from your flying subject. Look for simple, contrasting backdrops like a clear sky or blurred greenery to make your bird stand out. Using a wide aperture to blur the background helps isolate the subject.
Think about color contrast too. A dark bird against a light sky or a brightly colored bird against green leaves catches the eye more effectively. What backgrounds have you found enhance your bird photos the most?
Post-processing Tips
Post-processing is a key part of photographing birds in flight. It helps improve images that might not be perfect straight out of the camera. Editing can bring out details, correct colors, and make photos more striking. Careful adjustments can transform a good shot into a great one. Here are some simple tips to enhance your bird photos after shooting.
Enhancing Sharpness
Sharpness is crucial for bird photos to show fine details like feathers. Use sharpening tools carefully to avoid making the image look unnatural. Focus on the bird, not the background. Apply sharpening selectively to the bird’s edges for clarity. Avoid over-sharpening as it creates noise and halos. Use masking features in editing software to protect smooth areas.
Adjusting Exposure And Colors
Correct exposure brings out details in shadows and highlights. Slightly increase brightness if the bird looks dark. Adjust contrast to make the bird stand out from the background. Color adjustments can make your image look lively. Enhance blues and greens for natural backgrounds. Increase saturation gently to keep colors realistic. Use white balance correction to fix color casts.
Cropping For Impact
Cropping helps focus attention on the bird. Remove distractions from the edges of the frame. Use the rule of thirds to place the bird in a strong position. Leave space in the direction the bird is flying for a dynamic feel. Avoid cropping too tight, which can reduce image quality. A good crop balances subject size and composition.

Credit: www.youtube.com
Learning From Youtube Tutorials
YouTube offers a vast resource for learning how to photograph birds in flight. Videos show real examples and clear demonstrations. This visual approach helps you understand camera settings and techniques quickly.
Watching experts share tips can boost your confidence. You see how they handle different situations. This makes it easier to try new methods in your own photography sessions.
Top Channels For Bird Photography
- BirdWatching HQ – Focuses on bird behavior and camera settings.
- Nature TTL – Offers tutorials on wildlife photography techniques.
- Wildlife Photography by Paul – Shares tips on capturing birds in motion.
- Mark Denney Photography – Covers gear and flight shot advice.
- Photography Banzai – Explains camera settings for fast-moving subjects.
Applying Video Tips To Practice
Pause videos to absorb key points. Try adjusting your camera as shown. Practice tracking birds while watching the tutorial. Repeat the steps until you feel comfortable. Experiment with shutter speeds and focus modes. Videos help you learn without guessing. This hands-on approach improves your skills faster.
Joining Online Communities
YouTube comments and forums connect you with other bird photographers. Share your photos and ask questions. Receive feedback to improve your shots. Join Facebook groups or Reddit threads focused on bird photography. These communities offer support and new ideas. Learning together makes the process enjoyable and effective.

Credit: www.youtube.com
Frequently Asked Questions
What Camera Settings Work Best For Bird Flight Photography?
Use a fast shutter speed above 1/1000s to freeze motion. Set continuous autofocus and burst mode. Use ISO 400-800 for clear images. Aperture f/5. 6 to f/8 balances sharpness and light. Adjust settings based on lighting conditions and bird speed.
How Can I Track Birds In Flight Effectively?
Practice smooth panning with your camera to follow the bird’s movement. Use continuous autofocus to maintain focus. Anticipate bird behavior and position yourself where birds often fly. Stay patient and ready to capture the perfect moment.
What Lenses Are Ideal For Photographing Flying Birds?
Telephoto lenses between 300mm and 600mm are ideal. They allow close-up shots from a distance. Use lenses with image stabilization for sharper images. Fast lenses with wide apertures (f/4 or lower) perform well in low light.
How Do I Improve Composition In Bird Flight Photos?
Focus on the bird’s eye for sharpness. Leave space ahead of the bird to show flight direction. Use the rule of thirds to create balanced images. Include natural backgrounds for context and avoid clutter. Shoot at different angles for variety.
Conclusion
Capturing birds in flight takes patience and practice. Use the right camera settings to freeze motion. Focus on the bird’s eyes for clear shots. Keep the background simple to highlight your subject. Watch bird behavior to predict their movements. Try different angles and lighting for better photos.
Review your images and learn from each session. Enjoy the process and keep experimenting. Your skills will improve with time and effort.